More Radio Silence

I haven’t updated since September? Whoops.

In my defense, it has been a busy fall over here. In addition to the still semi-new job, I’ve been working on a bunch of non-house projects. Lots of them for my web design class (which is killing my free time, but I love it regardless). After the pipe project website, which you’ve seen, I redesigned an existing homepage:

Before

After

Then, I made this silly, interactive web art piece that pulls in tweets about bubbles and animates them like… bubbles (go tweet to it, it’s fun to see your message pop up!):

For my final project, I’m thinking of giving this here blog a new home. I’d especially like to include a clickable floorplan of the house that allows you to explore a timeline of renovation-in-progress photos by room. And by you, I mean me. I need to see lots of “before” pictures to remind me of how far we’ve come. ‘Cause it seems like nothing is getting done around here these days.

In other art an design news, I just finished up an Etsy commission – my first!

I was asked to create this graphite drawing of the architectural details of the buyer’s seriously awesome house. This is more of a geometric style than what I typically draw for fun, but I enjoyed taking on the challenge.

For more of my Etsy work, you can always visit my shop. 😉

Distracted by Pipes. Again.

I owe you more 2-year update photos, but I’m distracted. By homework, of all things. Did I mention that I’m taking a web design course? I’ve wanted to get some proper instruction on mastering teh internets for a while, but it wasn’t until I got my new job that the cost issue was resolved (read: the course is free through my very generous employer).

I’ve spent some insane amount of time on my first project (11 hours and counting), so I wanted to share it. And it’s house related! Our assignment was to create a site in which the content exists on one page -– no links leading to longer urls allowed. Well, except for anchors. But you know what I mean.

So I designed a visual tutorial of how to assemble the pipe shelving unit project. Come check it out:

Pipe website!

The class is designing using code only (no dragging page elements around -– actually, no visual editor period!), so I wrote the whole thing from scratch in what is basically a notepad file. And I made all the vector drawings, and the animation… and now I understand why I have a headache. Keeping up with these college kids is not easy. They run on Red Bull and require no sleep.

Speaking of web design, Ye Olde House Blogge could use a makeover… why is my header image broken?

Sigh. There’s always another project to tackle.

2 Years – Living Room

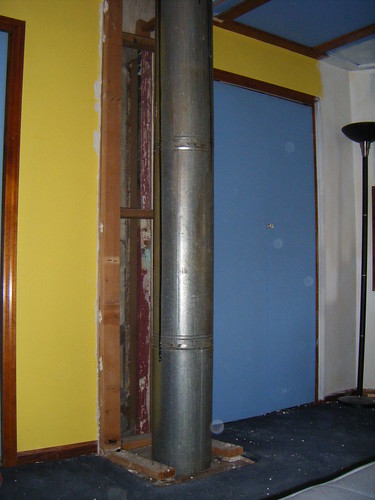
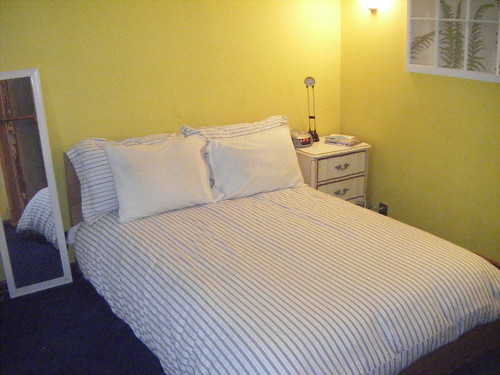
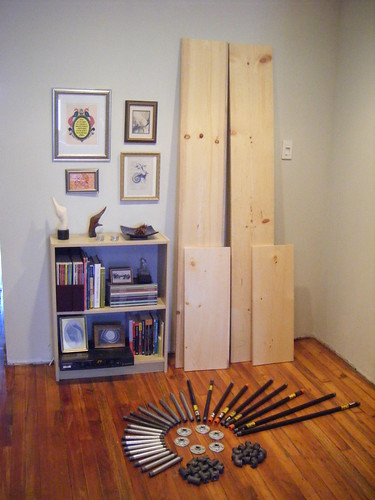
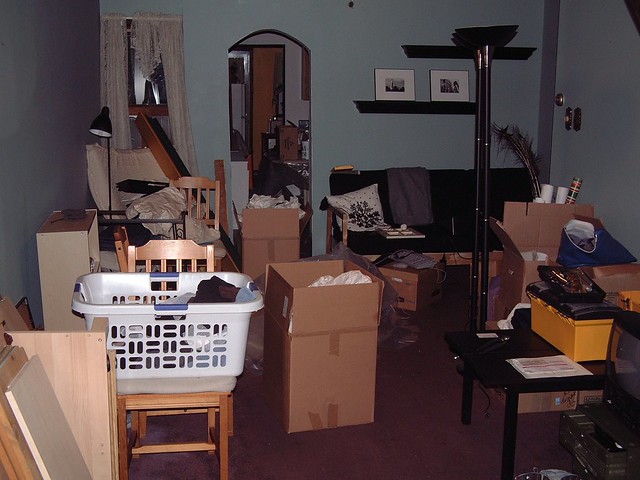
Whenever I feel depressed about the speed of progress around the house, I just drag out this picture. It was taken about 3 weeks after I moved in. The walls are blue, the kitchen is yellow, the curtains are lace, the floor is carpeted, and my stuff is everywhere.

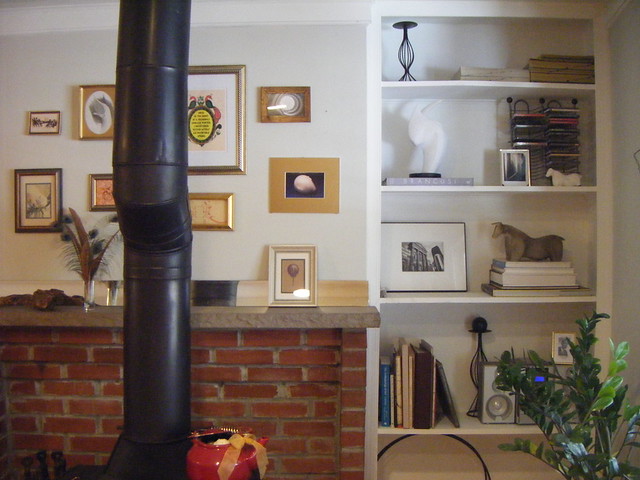
I’m still not completely in love with my living room, but I’m certainly closer! Here’s a shot taken from the same position today:

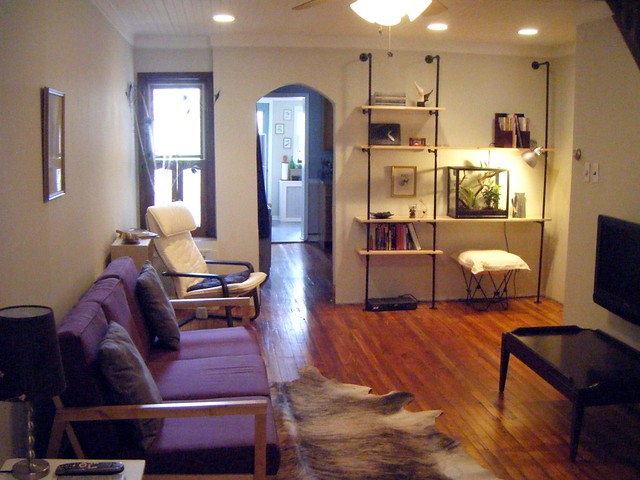
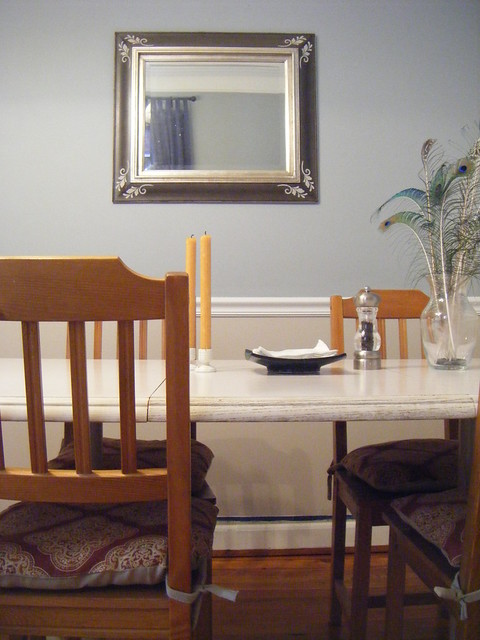
And facing the opposite way:

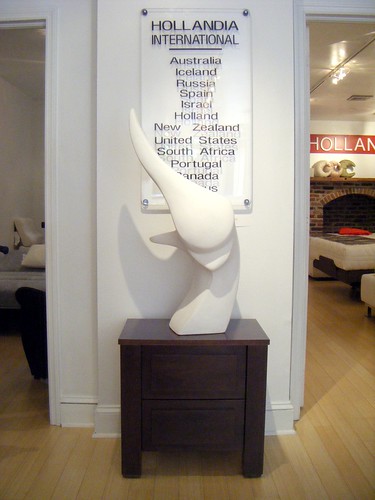
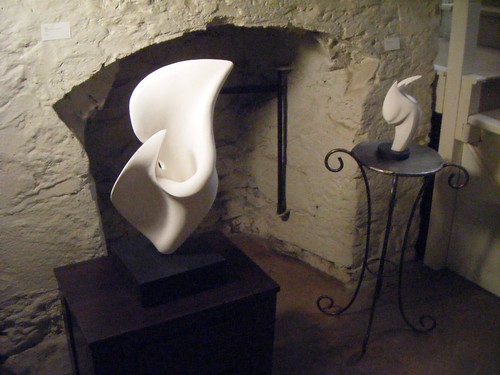
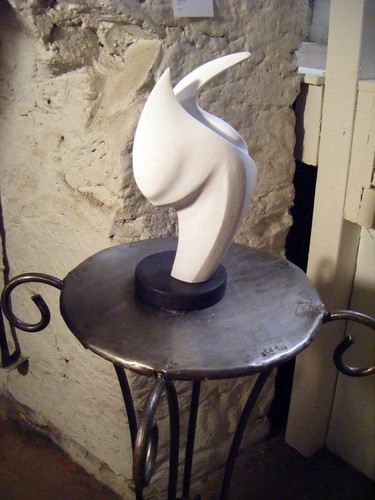
If you guessed that the sculpture by my front door is there only because I’ve been avoiding carrying it back down the stairs into my basement, you get a sticker. Heavy sucker. If it stays there long enough, I might start using it as a coat hook.

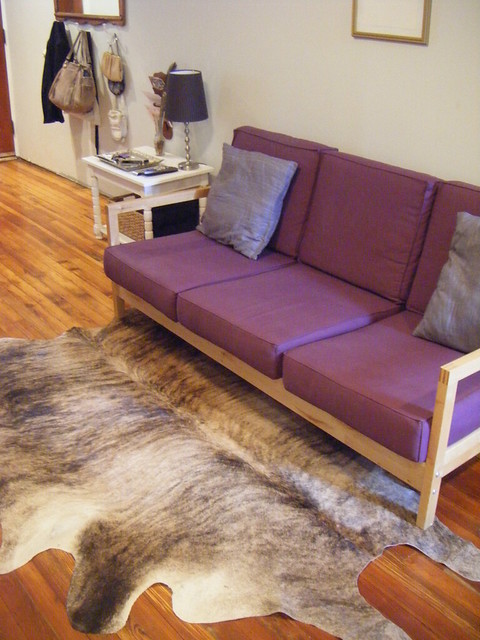
I still love my cow rug, which is a relief considering how much of a presence it has in this room. It’s the easiest thing in the world to care for, though. Just sweep it off with a broom along the grain of the hair, or wash it with a sponge the same way.

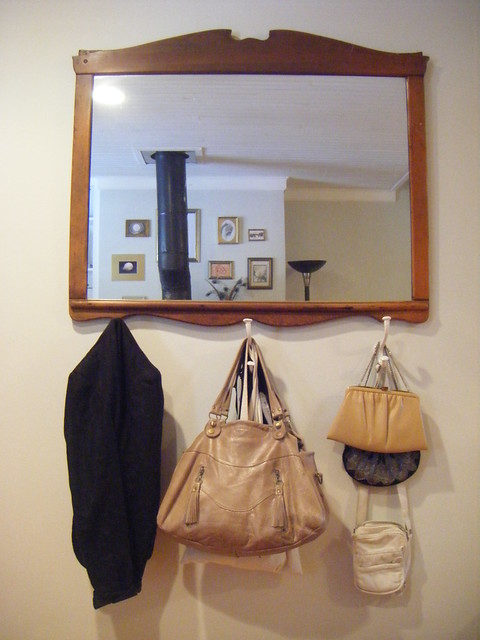
If I were a real design blogger, with sponsors and advertisers and product reviews and fancy stuff, I would totally have styled this shot on the left with some summer scarves and, like, a burlap grocery bag full of flowers. But hey, this is how the house actually looks. I hang coats on my coat hooks. And I never have money for flowers.

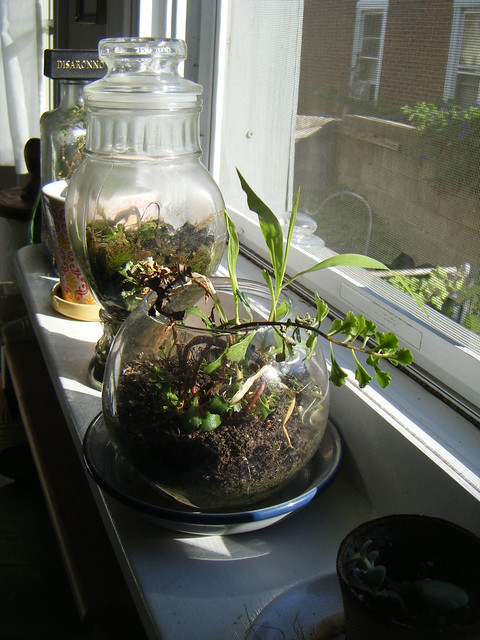
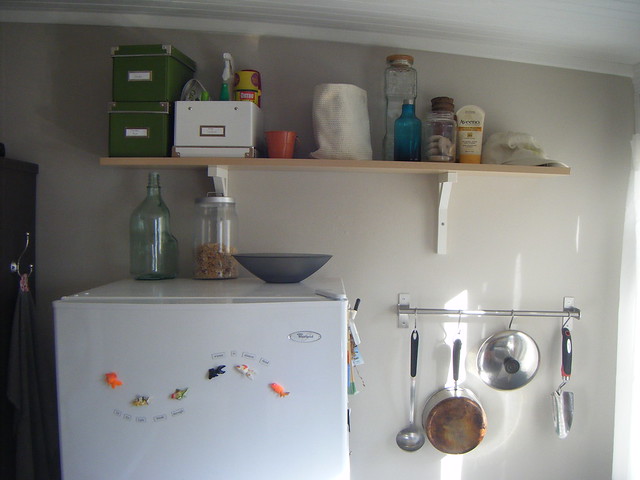
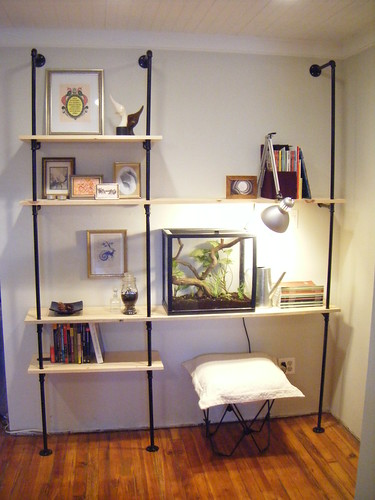
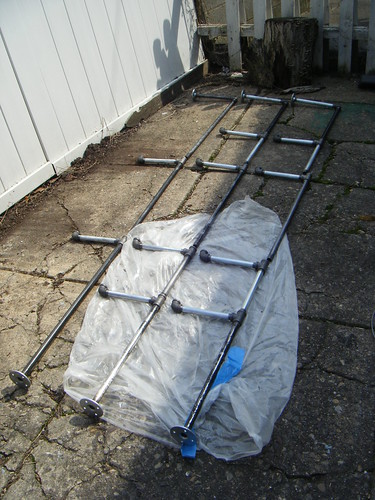
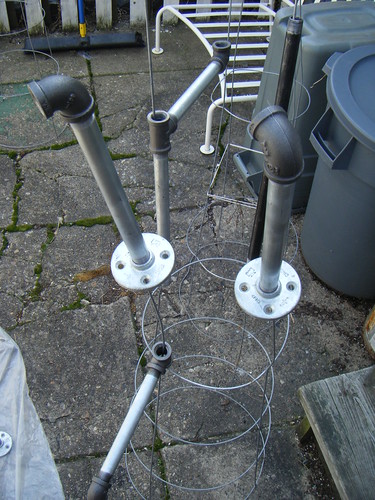
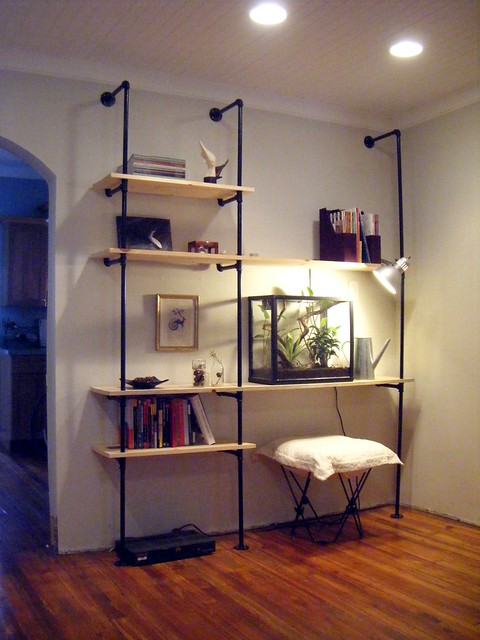
The pipe shelving unit project is a favorite accomplishment. It has become something of a curio cabinet for me, attracting all kind of feathers, seeds, plants, shells, and art about feathers, seeds, plants and shells.

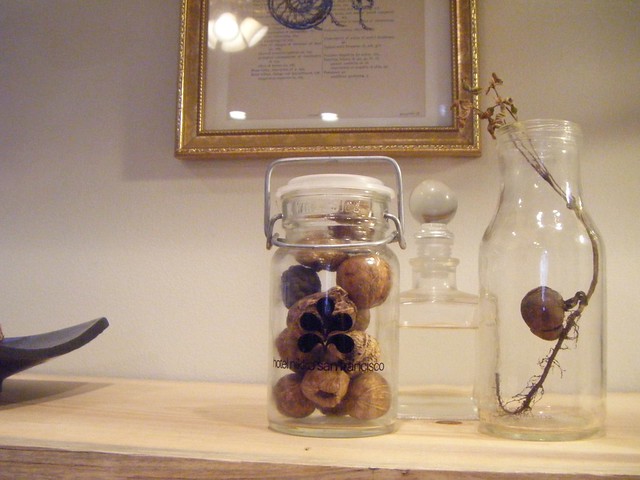
I do rotate items frequently, which keeps it fun. I’m trying not to bog this unit down with too much stuff.

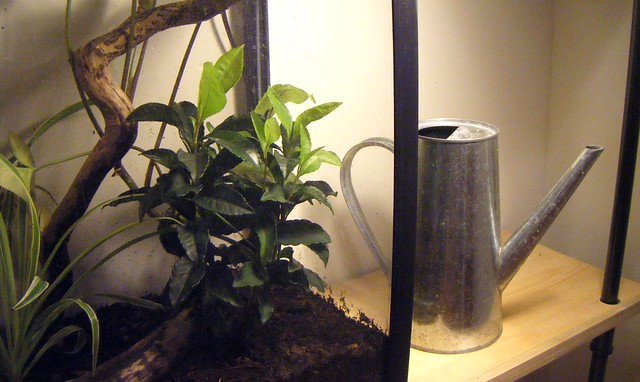
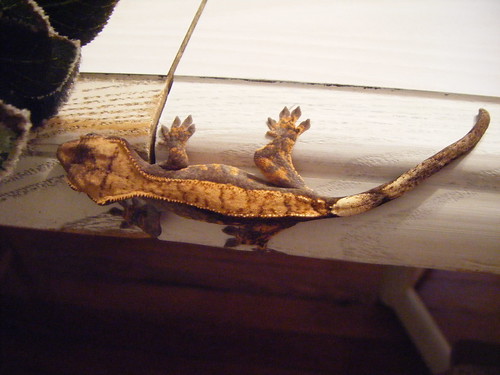
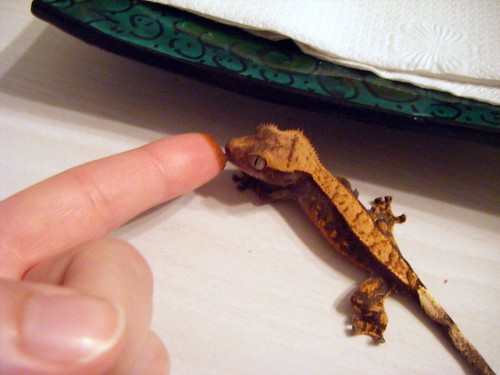
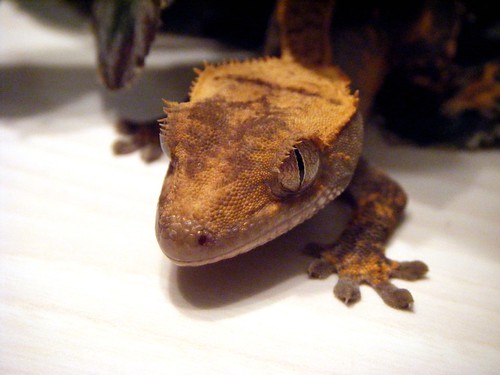
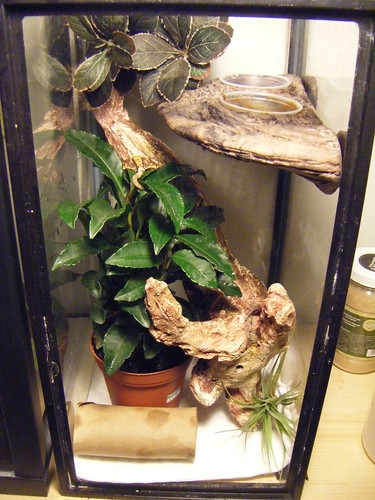
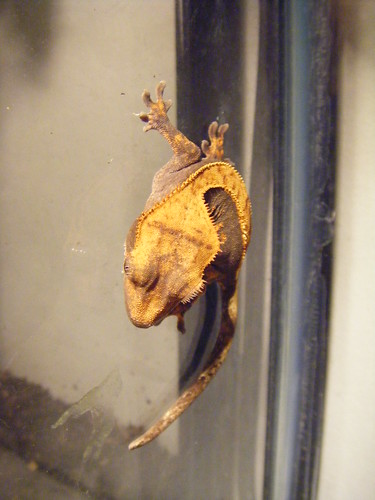
Well, except for the gecko. He’ll be a permanent fixture once he’s big enough to move into the new vivarium.

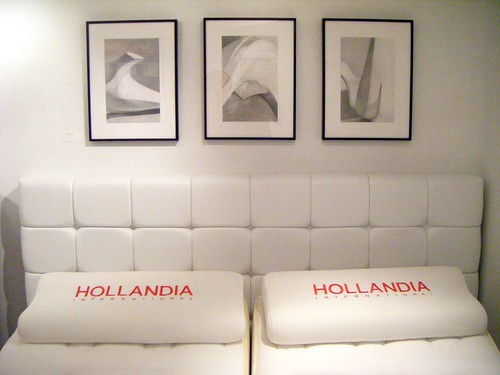
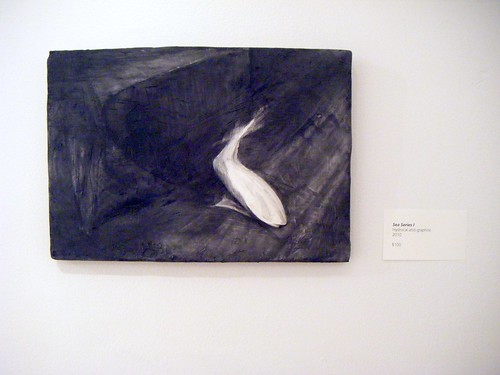
Here’s the rest of the art collection:

These pieces also rotate. I’ll probably need to do some editing of the wall-o’-art in the near future; I’ve gathered a whole lot of stuff.

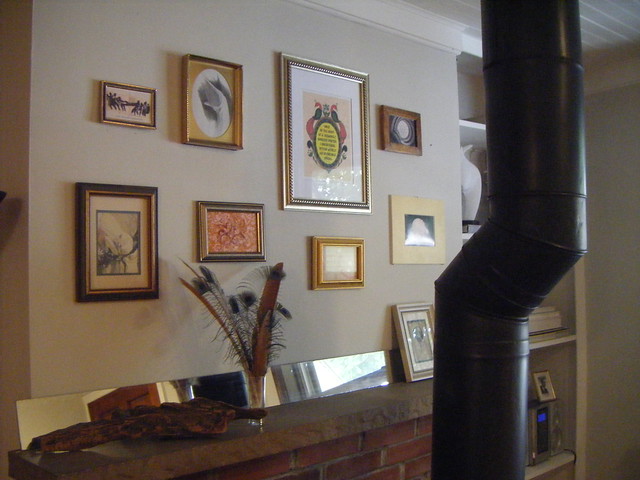
I like the effect for now, though.

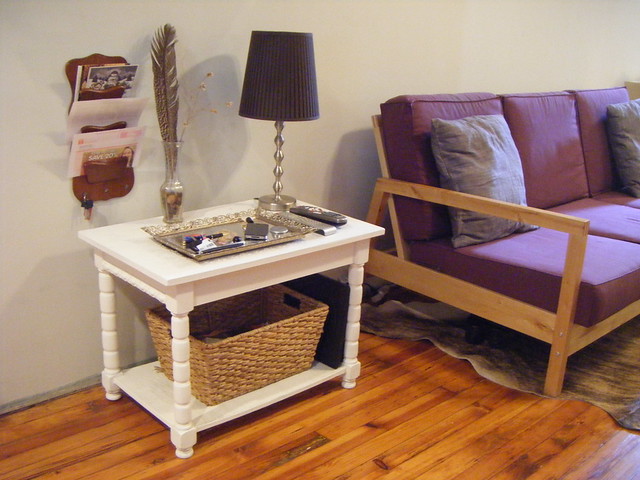
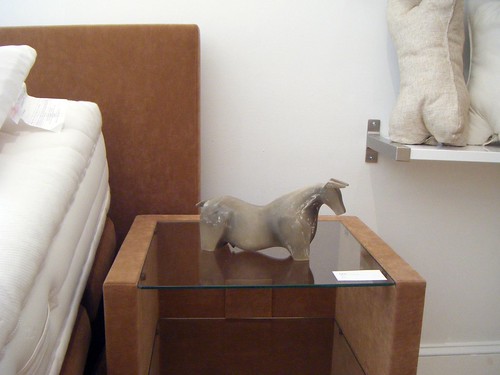
And now it’s time to talk about the lingering ugly bits. Because while I may have a cute end table on this side of the sofa…

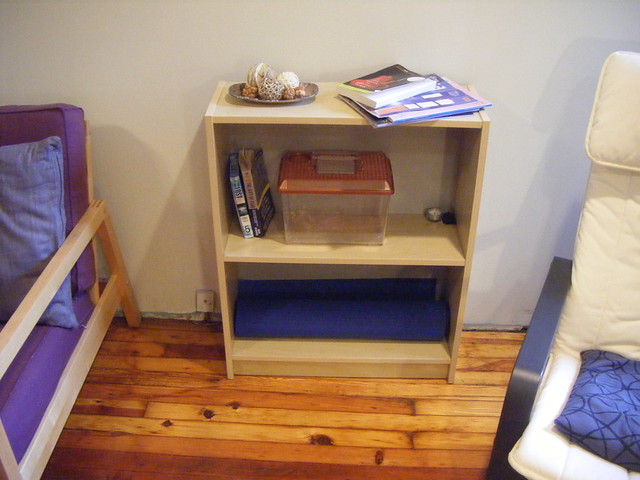
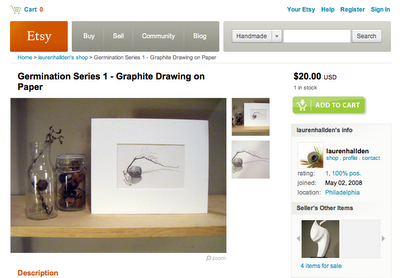
… what the heck is this thing? A bland Ikea bookcase holding a yoga mat and a cricket cage? No good. This should obviously be some kind of low, modern side table/credenza with doors to hide all of the weirdness. Like this thing. Too bad all the good thrifting for such furniture is on the west coast.

I think I have settled on using two end tables, though, over a coffee table. My living room is a decent size for a small Philly rowhome, but the space is long and skinny. Having that coffee table in the dead center of the room really messes up the flow of traffic. Which is why my table is here:

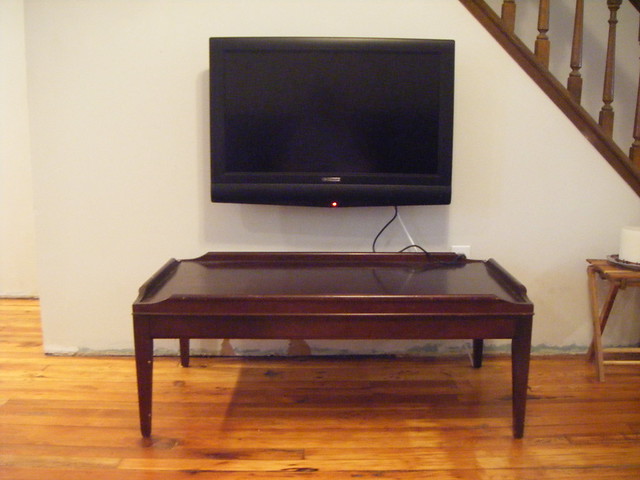
Yeah. That’s… special. I’m also going to need a low, modern media storage system, aren’t I. Why is attractive furniture so hard to get? Can’t I just build it all with pipes?

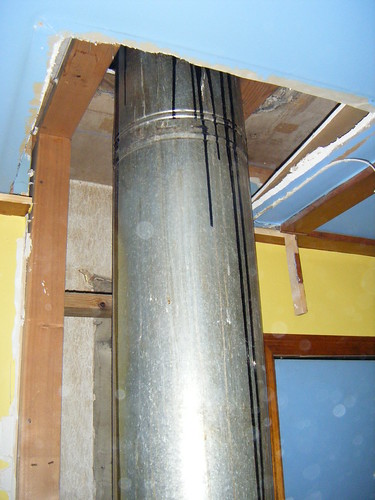
Oh, and then there’s that thing. Right. Pipes won’t fix that nonsense.

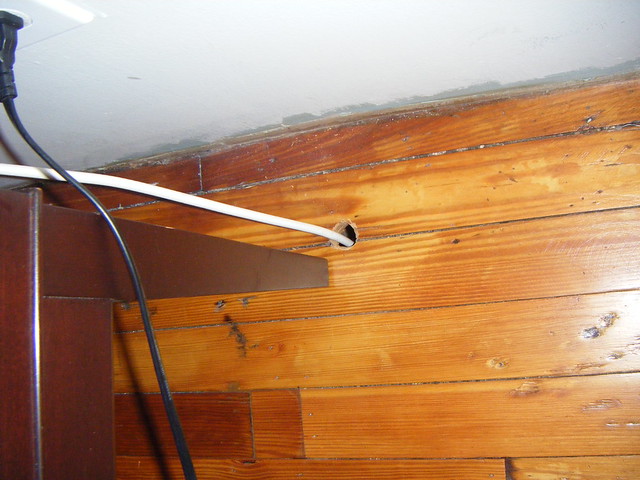
Ooorrr that situation. The astute among you may have noticed that my cable box is hiding somewhere that is nowhere near my TV. Definitely need to fix the wiring and consolidate this mess within a media storage unit.

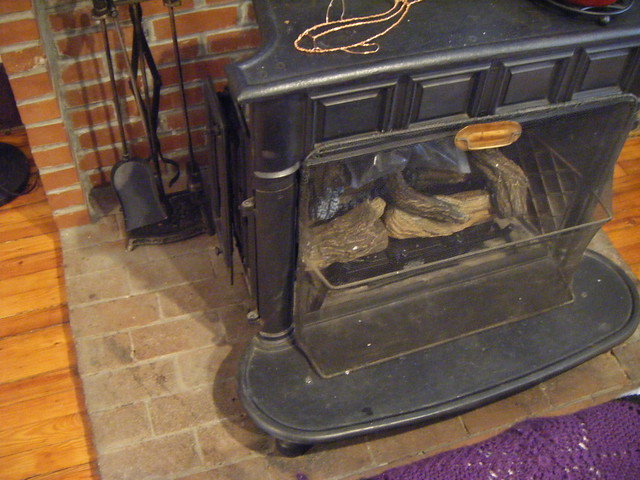
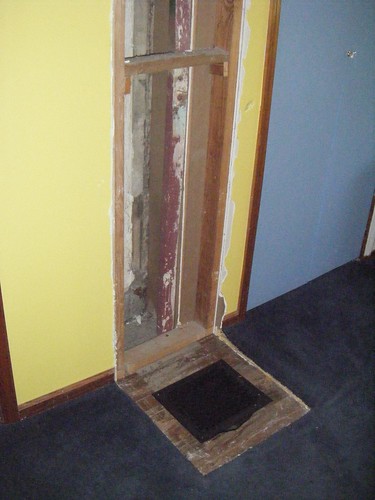
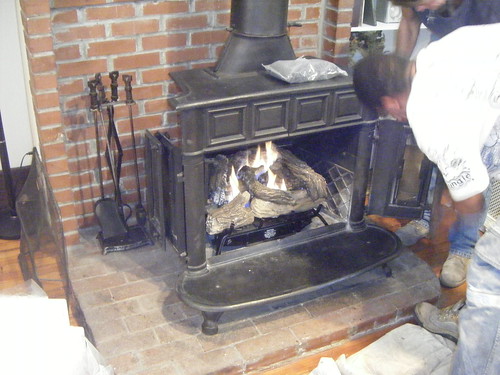
And then there’s this. Every time my heating contractor comes in here, he tells me not to paint the brick. I remain unconvinced. I’ve scrubbed the heck out of these floor-level puppies and that’s as clean as they get.

Something’s getting painted. I don’t know what and I don’t know what color it will be, but it needs to happen soon.

2 Years – Kitchen and Dining Room

My 2-year house anniversary post is very belated. Truthfully, I haven’t accomplished much this summer. Instead of painting and crafting, a lot of my time went into applying and interviewing for new jobs. It took 7 interviews, guys. It’s tough out there.

But that initial effort has resulted in a much happier, healthier blog author today. There’s even a little extra money kicking around for new projects (if I can manage to stop spending it on work-appropriate clothing!).

For this year’s entry, I’ve decided to go for honesty. I’ve made definite improvements to each room in the house, but lingering ugly spots remain. And ugly spots are entertaining, too, so I’m not gonna hide them from you.

Let’s start with The World’s Smallest Kitchen ™!

Man, every year I do this post I wish that my camera hadn’t been stolen, robbing me of all of my before pictures. These crappy inspection photos are worthless.

Anyway, that was then. Here’s where we are today:

The open shelving project has turned out to be one of my favorite things about this room. I had some concerns going in; people warned me that my dishes would get dusty or sticky, plus I cheaped out and went with some Ikea laminate shelves, so I was worried they might warp or peel. But so far, I have to say that the entire arrangement has been trouble-free.

And if you happen to have nice dishes (thanks, Mom!), it’s really lovely to see everything out in the open.

My second-favorite thing is this little window of bottles and plants. I rotate items in and out of this arrangement pretty frequently. Translation: sometimes I kill things.

I like the way the closed containers fog up in the morning.

And now for the ugly. I’ve pretty successfully rid this room of the ugly, except for one thing:

Sky. Blue. Counter tops. I’ve lived with them long enough now that I no longer wonder WHY anyone would pick this color every time I peek at them. And that scares me.

Let’s move to the dining room!

Ouch. Let’s not. I’m looking at this now and wondering if the green (?!) counter top in this room was picked to match the green chairs. I can offer no other explanation.

Today we’re a little better off, color-wise:

We still have the green and it still needs to go, but at least there isn’t any yellow for it to fight with.

That thing in the corner of the first picture is my gecko’s starter terrarium. He’s been living in this room because it has an air conditioner, and apparently I care more about moderating his temperature than I do my own.

I see you!

This is the first room I started working on, and it’s probably time to revisit it. I’d like to use this radiator cover space in a more interesting way. The room could use a rug, too.

Hulk smash green counter top! But that’s not even the ugliest bit:

Ah yes, the mouse hole that I plugged with steel wool, caulk, and a boat load of poison. Also, the electrical outlet that was stuffed into a hole far too big for it, and is therefore screwed to nothing.

I could fix most of this situation with baseboards, if I ever get around to baseboards. The kitchen had some that I saved when the floors were redone, but the living room had nothing. I don’t know if I can match the old ones so I haven’t reinstalled them.

Yeah. That’s a pretty poor effort.

Coming soon: the living room and more!

First Friday Show

The Hollandia International showroom exhibited a perfect marriage between art and luxurious sleep systems last night.  Here are a few images from the show!

Thanks to everyone who came out, and many thanks to Stefan for hosting me.  If you’re ever near the store, drop by and have him demo an adjustable mattress for you.  They’re incredibly fun and far too comfortable, plus Stefan really knows his stuff.

First Friday and more

This Friday (as in, two days from now — yipes!), the fine people at the Hollandia International showroom in Old City are hosting some of my art work. It’s a rare opportunity to see Lauren pieces in the wild! Normally, I keep them cooped up in this little house.

I’m bringing sculptures and drawings and I’m showing alongside a painter, so there will be a nice variety of things to see. Also: very awesome, very innovative sleep systems. Also: wine.

Here’s the address:

149 North 3rd Street
Old City, Philadelphia
Philadelphia, PA 19106

In preparation for the show (and in hopes of freeing some of those aforementioned pieces from captivity), I’ve launched an Etsy shop! I’ve only listed a few pieces, but I’ll be adding more in the coming weeks. Check it out here:

etsy.com/shop/laurenhallden

OK, now off to finish the rest of my to-do list, which is, hmmmm… nine more items long. Including one line that says “finish that new piece you’re working on.” Right. See you on Friday!

It’s 90 degrees; why not work on the fireplace?

I first decided to reclaim some space in my master bedroom by converting my wood-burning stove to gas, eliminating the need for the giant exhaust pipe running through the bedroom, back in September. The project didn’t get off the ground before winter came. And my bedroom has looked like this ever since:

Not cute. Not at all.

Today I finally got some guys in here to rip that whole mess out.

See ya later, pipe!

The hole in the floor is now covered with this nice vent, which will help control the flow of hot air from the gas stove in the living room below. And the hole in the ceiling, you may ask? Let’s pretend that doesn’t exist for now.

The guys tested the stove and it looks like it’s going to be nice and cozy when winter rolls around again. The fire is relatively realistic; the blue glow of the gas flames is mostly hidden within the stack of “firewood,” leaving the little yellow bits happily flickering away.

But here’s the thing I’m most excited about: now, instead of cramming my bed in a corner, there’s enough space to treat this room like a real master bed!

Excuse the yellow paint. That’s going to get fixed. Right after I fix ceiling and the hole in the wall, and right before I re-carpet.

I need to start accepting donations.

A Gecko Named Ox

Ever since the passing of my pet praying mantis, Carolina, and my fish, Phineas, this ol’ house has felt a little lonely. I decided that I wanted a pet that offered a bit more interaction, but could still be left to its own devices when I’m not around (read: no dogs! My parents have that covered. I’d link you to pictures, but both of their Flickr accounts have privacy settings, dammit.).

My thoughts drifted over to the reptile kingdom. Most species seem to require a lot of upkeep, which sounded like a bad idea to this newb. I’m not feeding anything baby mice, or clearing a section of my living room to make way for a 4′ x 2′ tank complete with replica desert. I needed something simpler and more foolproof. Finally, months of research and preparation culminated this week with the delivery of this little guy:

Meet Ox!

Ox (short for oxide, chosen because of his rust color), is a crested gecko. Cresties are perfect for new reptile owners; they stay fairly small, they prefer temperatures between 60-80 degrees, they don’t need special lighting or heating, and in the wild they eat mostly fruit. A powder diet developed for pet cresties (that smells like a fruit smoothie when you mix it up) is all they need to eat. Some of them do like crickets, which make a good treat, but it’s not a necessary part of their diet.

He’s eating off of my finger!?

Ox here is just a baby, born last December. If I keep him happy and healthy he could live for 15 years. Actually, we’re not really sure about the natural lifespan of a crested gecko. The species was once thought to be extinct until a population of them was found on an island in the mid-nineties. From some samples that were brought back to the US, a growing captive breeding program has sprung up thanks to their popularity with reptile keepers.

I especially like that this species is arboreal, so I got to make up a fancy planted vivarium for my little guy. But he’s got some growing to do first before he’ll be ready for his big cage. Right now he lives here, in his starter home:

If you look closely you can see his butt perched on top of the larger pant. Ox can climb anything; he’s got sticky pads on his feet (and tail!):

What a character. I’m glad to have some life in here again.

Pipe Shelving Unit – Finished!

It has been a long time coming, but today I finally get to share with you some before…

…and after pictures!

90% of the pipe shelving unit project was preparation. After the measuring, planning, re-planning, struggling to find supplies, etc. was behind me, the project came together in just a few short hours. I had expected to spend all weekend assembling the unit, and later to sum up the experience with a blog entry that began, “No part of this project was simple — do not attempt!” And yet I found myself staring in bewilderment at a finished product sometime around 3:00pm on Saturday. But let’s go back to the beginning.

The first step was to trim my longer two boards down a bit (I was too generous when estimating the size of my wall), and then to drill several 1″ holes at specific points where the pipes would pass through.

This picture makes my basement “woodshop” look almost respectable. I assure you, it is not.

Once the cutting was finished and the boards were sanded a bit, I briefly considered patching up all their knot holes and staining them darker. But what I liked about this project was that it used only industrial materials — in keeping with the theme, I had purchased the cheapest utility-grade wood possible — so why not just embrace the imperfections? I decided to roll with the “scratch-and-dent section of Lowes-chic” look. This is probably what kept my assembly time down, and I don’t regret it at all. You’ve gotta cut yourself a break when you can.

From that point on everything was easy as pie, as demonstrated in this adorable gif:

avatars myspace with Gickr

Here’s a shot showing how the shelves are supported:

Since the elbow fittings are designed to have just the same height as the tee fittings, the boards sit very evenly on these two points. And since the majority of the weight of the unit rests right on the floor, all I had to do was secure the top flanges to the wall with a couple of drywall anchors. The unit is remarkably stable. I’ll have to wait and see if the boards start to deflect over time, but if they do I can easily unscrew the whole thing and replace them.

And that’s it! A 3-month project finally wraps up. I’m sure I’ll be posting more pictures soon, particularly when that vivarium’s new resident arrives…

Notes:

1) I’m sorry all of my pictures look like they’re taken with a fish-eye lens. I’m working with a super cheap camera right now.

2) I’d post the final supply list, but I’m pretty sure it would only work for someone with a floor as sloped as mine. I believe the pipes on the left, starting from the bottom, are 18″, 12″, 24″, 10″, and 18″ segments. The segments on the right are something like 29″, 24″, and 31″, though 32″ was probably ideal. Shelf supports are 8″ each and the pieces that connect to the wall up top are 10″, though if you can find 9″ that might work better. BUT only if your wall is nice and flat!

3) Yes, I know, I still have no baseboards. It’s been — what? — a year? I should really tackle that next.

After finally gathering all the supplies I need for the pipe shelving unit project, it was high time to start building the thing. But of course, it wasn’t that easy. Painting comes first.

And washing comes before painting. I laboriously stripped the grease off of each part using a scrubbing pad and dish soap. And my bathtub. I was not as thorough as I should have been. Meh.

I arranged the pipes outside to dry, and also to eyeball their overall lengths. The one on the left (which will end up on the right of the unit) is a bit shorter. This should work out well. Should.

I’m not naive enough to think I’m out of the woods with these pipes yet.

I used upside-down tomato cages to hold up the pipes for spray painting. How much does this photograph resemble a Dalek?

Exterminate. Exterminate.

That’s better. Glossy black paint can make anything look less janked up. This is another tip I learned from Morgan.