Quick DIY end table

The day before New Year’s Eve I had just finished up the massive baseboard project and I was too pooped to do much, but I poured a Manhattan and fell into rearranging the craft/sewing room. Furniture was moved. Wacky collections of objects were rearranged.

(From Instagram: weeds from Port Richmond railroad land, peacock feathers from my last job, a container of spare buttons, an empty bottle of port from my only trip to California. These are the things I save.)

Sitting in the room was this piece; what I assume is a plant stand gifted to me by my sister, champion houseplant cultivator, as a housewarming present.

I really liked the lines of it, but I never knew quite how to use it. My house doesn’t get enough light to support plant life in anything but a window. So it had been hanging out unused in the craft room for, errr, five years, waiting for inspiration (and Manhattans) to strike. Finally, they did.

Please excuse my terrifying basement.

From a bit of leftover shelving I cut out a circle to match the diameter of the plant stand. After some sanding and stain…

Instant end table. It’s just the right size for the little corner of the room occupied by my old butterfly chair.

The wardrobe and chair have traded places, which I think makes the room look a little lighter when you first walk in.

The hodgepodge of furniture I own really is insane. Especially in this room, which became a sort of catch-all for things I wanted to save but didn’t know where to put. But I think it kinda works. An area rug would be nice, but meh. I’ll probably get to that in 2020.

Oil wipe Lauren circa 2003 is judging you.

Project: Paper Cutting

I’ve been doing a lot of graphic design work lately, both freelance and as coursework. But once in a while I still manage to steal some time for a personal project. I felt this one was worthy of a quick share.

When the writer David Rakoff passed away last month (causing me to twitter-curse cancer for the zillionth time), I came across this beautiful tumblr of all the gifts he’d given his close friends on special occasions — birthdays, bar and bat mitzvahs, etc. Among the images I found some stunning paper cuttings, usually featuring drawings of koi framed with elegant hand lettering, presented to parents upon the births of their children. I thought it was such a sweet commemorative gesture, I couldn’t wait to inflict it on my own friends.

And wouldn’t you know it, I happened to have a pregnant friend! The first soon-to-be-mom of my childhood crew! And her baby shower was fast approaching!

Not knowing the kiddo’s name or birth date, I opted to do a test run of the paper cutting idea and present my friend with a mini coupon done in the style I’d use for the real deal. I mocked up a basic design digitally and then transferred the sketch to — wait, I don’t have any black paper lying around the house somewhere? Really? Anywhere? No?

Huh.

Okay, fine. How about this:

DIY crisis averted.

I also thought this would be a fun project to time lapse, so I propped my iPhone up with a stand made of clay and got to work:

[flickr video=7976498218 secret=b9e2466c3f w=640 h=360]

Yeah. Oops. Clay = malleable.

But while I totally botched the video, I managed not to destroy the thing that mattered:

I think the key to this technique is to be very, very precise about your pencil lines. For example, although I outlined each letter and design element distinctly, before I started cutting (read: ruining everything) I went back in with an eraser and clearly indicated the places where objects connected. I think this helped me avoid errant (and potentially disastrous) cuts. That and taking frequent breaks for hand cramping. And also talking to myself. I’m sure my neighbors find the girl on the other side of the wall who verbally admonishes herself not to screw this up charming, right?

Ta-da! One hand-cut coupon, and also one totally freehand giraffe onesie.

…do people come that small? Seriously?

Gosh.

I’ve got some things to learn about babies. Can’t wait to meet your little one, M & D!

Mothra

On a family hike after the last brutal heat wave, I happened to look down — who am I kidding, my eyes are always firmly glued to the ground during hikes — and spotted this fella:

QUICK, CALL GODZILLA.

Dad and I googled it (“giant moth wtf bbq,” natch) and it’s a polyphemus moth, a member of the giant silk moth family. Dad figured the heat had killed it off, although our fuzzy friend looked as though it had been around the block a few times anyway.

I picked it up and brought it home, of course. On my second trip to the thrift store I lucked out and found a set of little shadow box frames for $2, one of which was the perfect size for Mothra:

At this point I googled “how to mount a butterfly” and received a wealth of information, most of which I did not choose to follow. I did find it true, however, that dead moths are very brittle and it helped to stow this one in a sealed box with hot wet towels for a bit. After it had loosened up and I had arranged its wings, I poked a few little pins through the back of the board and pressed Mothra down gently, keeping up a steady stream of I’msorryI’msorryI’mreallysorry as I went.

Check out the one remaining feathery antenna. Mothra embodies the spirit of this house rather well; most things in here aren’t shiny new and perfect, but you can find the beauty in them anyway.

Looking around my office right now, I spy:

  • one giant battered silk moth
  • a little vial of mystery teeth
  • the top of a deer skull
  • two geode slices
  • a chunk of driftwood
  • a few pressed leaves
  • a jar of peacock feathers

I’d better start limiting my dating pool to those involved in the natural sciences, huh.

A truly happy holidays

I’m not normally a big Christmas girl, but this year I’ve been earnestly looking forward to it ever since jacket weather started. Perhaps it’s because I recently added Chez Larsson to my RSS reader, and Christmas in Sweden just seems so…magical. Whenever Benita posts a photograph of her cozy little house at dusk, all cheerfully lit up with candles and strings of holiday lights, I immediately want to beam myself over there to share a cup of something warm and play with bits of ribbon and paper. (Sidenote: if you’ve never seen Benita’s blog, holy hovjärn*. Her house is incredible. I have no idea how she keeps it so clean; I suspect Scandinavia is an enchanted place where dirt just falls from your shoes out of politeness before you enter the house.)

So maybe it’s Sweden. But also, after what has amounted to a really horrible year for myself and my family, maybe I’m just appreciating the comfort and the togetherness of the holiday season more than I used to. Bad shit — not just the normal “my life isn’t living up to my exceedingly high American expectations” angst, but the really bad shit — has a way of clarifying how important family and friends are. And why wouldn’t you want to bake a ton of Christmas cookies for the people who have been lending you kleenex and a listening ear for six long months?

Or, replace cookies with candied pecans in my case:

I made, um, 3 pounds of them. Packed up in little IKEA jars and spruced up with tags I cut from an old gift box, they make pretty good hostess/office gifts.

Let’s see…what other Benita-esque photos can I share? You can see that, after many shenanigans, we finally got that pesky tree up. Here’s what goes under it:

I have serious present-wrapping envy when I skim other DIY blogs. People do some amazingly elegant and creative things. Me, I had no present-wrapping game plan, so I had to put this together in an hour or so using whatever I had lying around. And then I whipped up one of these…

…using a few leftover tree branches. The icicle lights pressing up against the ENJE shade make a pretty nifty pattern, but I wanted something to cover the lower half of the window. Enter the wreath made of reject tree parts. I googled how to make tissue paper flowers and added a few of those to fancy it up a bit, since I don’t have access to holly berries or anything.

That’s all from this holiday house! Enjoy your together time, everyone. Have a glass of glogg for me.


*Horseshoe, apparently. I was just going for the alliteration.

#Sewstupid

I don’t know why, but I had never asked to see pictures of my parents’ wedding before my mom passed away.  So one of my favorite parts of the memorial service was getting to see a few old images of her in her wedding dress — a pretty floor-length white and floral piece that she had designed and sewn herself.

In the back of my mind, I was still holding on to that picture of my mom happily sewing away when, a few months later, I saw this float by on Pinterest:

A PDF dress pattern!  That I could print from my own computer!  Too easy to pass up.

This particular design featured an easy elastic waist and no zipper, so only beginner construction techniques were needed.  I grabbed my mother’s sewing machine and decided to tackle the project.

I knew next to nothing about sewing, of course; the most I’d managed to do was alter a few waists and hems.  So if you were following me on Twitter, you witnessed a steep learning curve: I accidentally sliced a 3-inch gash in one of the back panels, I sewed an armhole closed, I ran short of fabric for the skirt, I attached fusible interfacing backwards, I bumped a knuckle with a hot iron.  My first dress took a whole day to complete, and halfway through I realized that it would not actually be wearable.

But I was not frustrated.  In fact, I was doing better than I had expected to (thanks to Pattern Runway‘s very detailed instructions, definitions and blog tutorials, and also thanks to my mother’s relatively foolproof machine), so I decided to push forward.  I figured I’d get all the mistakes out of my system and re-do the whole thing a week later.

The first dress’ main problem was my choice of fabric.  Not knowing anything about selecting materials, I had visited a Joann’s in the suburbs and bought a cotton quilting fabric (which is what they had the best selection of — that, and flannel).  I liked the pattern, but the cotton was stiff and didn’t drape the way the design needed it to.  On second consideration, this was clearly a material more appropriate for a throw pillow.

So I decided to step it up a bit for dress #2: I planned a trip to Philly’s famous fabric row (yay!)… where I arrived to find half of the stores closed (huh?).  Now I realize this was Memorial Day weekend, but it wasn’t Memorial Day itself — this was noon on Saturday.  And I feel that if your website says you have Saturday hours, someone should probably be there to open the doors on a perfectly good Saturday.  /rant

The few places that were open had very helpful staff, but I didn’t find much that I liked.  They mostly seemed to specialize in upholstery fabric and satins for bridesmaids.  So I headed off to a fabric store near Market East — also closed.  Finally I remembered a Jomar fabric warehouse in Kensington — the location had gone out of business.

What.  The.  Hell.  Do you have to live in New York to buy this kind of thing…?

Luckily, Jomar had hired a guy to stand outside of the empty Kensington store and redirect people to the next nearest location.  So I found myself driving way north to Rawnhurst, having started the day driving way south to Queen Village.  But the runaround paid off:

At Jomar I finally found a drapey black fabric with a nice subtle texture — a pre-cut 3 yards for about $7 — sitting in the designer clearance section.

This fabric (maybe some kind of rayon…?) had a tendency to shift suddenly under my scissors, and the edges of my cut pieces wanted to fray.  I was convinced I would end up with a crooked, sad little dress.  And I was totally shocked when that didn’t happen.

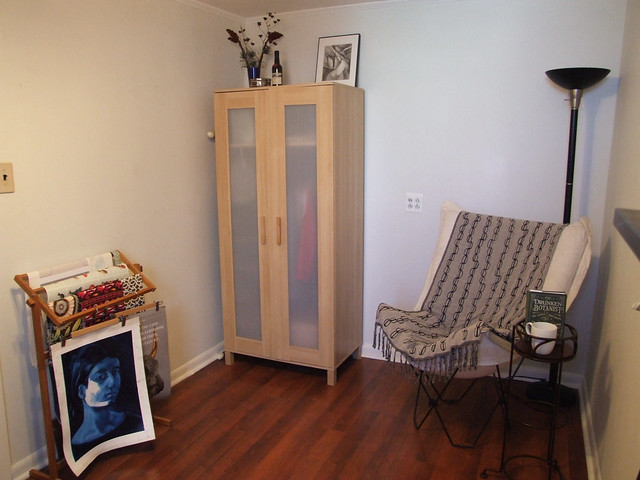
I am ready for my Architectural Digest photo shoot!  (My house is not, but hey.)

It took approximately 2 full days of work and about $60 to arrive at a finished product ($25 of which was a pair of really good fabric scissors, which I figured I’d use on lots of house-related sewing projects some day; $10 went to buy the pattern [also reusable]; $13 was on fabric for the first dress; a couple bucks went to buy interfacing, buttons, elastic, etc., with plenty left over).  I wouldn’t say this is a super cost-effective way to go about filling your wardrobe, but I actually enjoyed the process a lot.  Listening to the rumble of a sewing machine (and a bunch of good podcasts) is a relaxing way to pass a rainy vacation day.  And you can’t beat the satisfaction of trying on a finished product that actually fits.

This morning I woke up to an email from Pattern Runway with a customer appreciation gift attached:  a free PDF pattern of a long gathered skirt.  While at Jomar I happened to grab a few yards of a blue-gray wool blend from the discount fabric table as well… I think I see a new hobby forming.  I won’t be making wedding dresses any time soon, of course.  But still, I like that image of my mother and me — separated by decades and unfortunate circumstances, yes — but both pinning patterns, pressing seams, quietly passing a rainy day.

I’ve been working through a backlog of projects I’ve meant to post about, but couldn’t finish during the normal work week. I get home too late to photograph anything in decent lighting. But when I get vacation time, I’m free to barrage everyone with frequent blog updates!

Here’s the last of my saved-up posts. Holiday decorations!

Using the time-honored fold and snip method, I made a curtain of paper snowflakes. I think I’ll make more and use them in place of the to/from card on my holiday gifts.

Also, I was inspired to try my hand a wreath-making by all of the evergreen boughs we had to slice off of the Christmas tree to get it to sit in its holder.

Design Sponge has a nice tutorial. I wasn’t about to go cutting the roots off of my succulent plants to add them to the wreath, although their version sure looks nice. My version includes some funky seed pods and lots of stuff collected near where I work.

That’s it for me! I think the house is officially festive enough for a holiday party. Hope to see you all there.

In my brief foray into gardening this weekend I managed to piss off not one, not two but five praying mantises. Each time a tried to snip a stray morning glory vine or yank a weed, one of the beefy-armed bugs would appear from nowhere and try to clamber up my arms. And then I’d squeal and drop the offending foliage, mantis and all. Sorry, creepy alien bugs!

(That’s my neighbor’s house. Excuse the general dilapidation.)

The mantii(?) may actually be making a dent in the fly and mosquito populations around here, because this afternoon has been downright pleasant outdoors. I managed to get more sugar snap peas planted, a few varieties of lettuce and also some butternut squash. So far, my container gardening experience this year had been mixed: I got lots of unblighted tomatoes (although on the smallish side), plenty of herbs, only a few peas, and no peppers so far because something is destorying the hell out of my pepper plants. Grrrrr. Get ‘em, mantii!

Also in the gardening/bug catching vein, I’ve planted this venus flycatcher in an old lidded jar I picked up at a thrift store, and it’s now one of my favorite things. Whenever I spot a fruit fly droning around the garbage, I catch it in a cup and dump it into the flytrap jar. It’s like a slow, very low-stakes gladiator contest.

That trap in the lower left is eating an enormous black fly! And somewhere in there right now is a nasty tiger mosquito!
(I’m not sadistic, I just hate bugs. Unless they eat other bugs, of course.)
Edit: I’m told that mantises is actually acceptable. Also, mantes and mantids.

Jack and I recently made a trip to Anthropologie to pick out a dress for my birthday. When I’m there, I like to scour their homewares section for ideas — not for stuff I can buy, necessarily, but for stuff I can recreate myself on the cheap. Anthropologie and Urban Outfitters really never disappoint in this department. I’ve already blogged about a jewelry stand project I borrowed from UO, and I found some great instructions a while back for making a DIY Anthro endtable out of a set of IKEA small storage drawers and some Home Depot molding. Beats spending $698!

As I’ve been on a gardening kick lately, the new terrariums at Anthropologie caught my eye. I’ve been noticing terrariums on design blogs for a while and they just seem so enticing. Like if you look closely enough at the miniature world behind the glass, you might be rewarded with a tiny unicorn sighting. Or something. Err… anyway, I was ready to grab a bell jar and plant away. Here’s Anthro’s version:

At 12″ high, it’ll cost you a cool $168. Jack and I spotted a much smaller version in the store for $38 — still unjustifiable, if you ask me. So I took a cue from an equally overpriced book they were selling on the “Thrift Store Chic” design aesthetic, and took my business to my local Red White and Blue. It didn’t take long to find a little glass bowl with matching lid for 99 cents. I took it home, scooped some gravel out of my aquarium, borrowed some dirt from the veggie garden, and I was ready to plant. It’s been so wet out lately that I had no trouble finding enough moss to carpet my tiny ecosystem.

After that I added a few… well, let’s be honest, they’re weeds. Two kinds: one that looks like a mini tomato plant with green and pink leaves, and one that looks like a teeny vine with some purple polka dots.

I put the terrarium in the kitchen by the window where the little globe fogged right up. The whole project was less than a dollar. And I like it enough that I think I’ll make a matching one for my bedroom. I just spotted a similar bowl with a stem and foot like a wine glass at a different thrift store…

I’m blogging today from the great outdoors, if my backyard counts. I finally got patio furniture!

Just wanted to share a little DIY project before the week starts up and I get busy again. It involves finding a second life for the bunches of empty paint cans I’ve been accumulating since I started working on the house. I didn’t really want to chuck them out, so I saved the empties to use as flower planters. Here’s what they looked like back in March:

Inside each can, I inserted a plastic plant pot just small enough to fit inside the bucket, but big enough to leave a little rim sticking out to hold it in place. Figured it was better not to let the plants grow in latex paint water! I punched some holes in the bottoms of the cans for drainage, and filled the plastic pots with potting mix and some wildflower seeds.


The hooks were already there, so I hung a can on each. And here they are today:


I didn’t expect the cans to rust (aren’t they tin??), but I’m glad they did. The color is really nice against the back wall of the house. The plants haven’t quite got this “flowering” thing down, though. We’ll see what happens.

A limb came off one of the street trees near my house during our most recent snow storm. After walking past it few times on my way to the grocery store, I decided to cut a couple of branches off and take them home. The thicker parts were grey, with reddish tips indicating more recent growth — a nice combination of colors to accent my warm-grey living room.

At first I figured I’d put them in a vase, but they were just too cumbersome to walk around. My next thought was to mount them to the wall. A quick glance at my super-low ceilings nixed that idea — not enough space. (But hey, my heating bill is low, too, so I can’t complain.) I had to find a way to tame the tree.

So I came up with this fun little project. Plan C: turn the branches into a 3-D “painting,” without the frame.

I rummaged through some old art supplies and picked a piece of illustration board to use as a size guide. Then I arranged a couple of branches on top, minding the composition the twigs were creating across the rectangle’s field.

With a trusted Sharpie, I marked the places where the branches hit the edges of the board. I then hacked across my Sharpie lines with a jeweler’s saw, mimicking the boundaries of the board.

Now I had a couple of branches cut into a perfect rectangle. And a carpet covered in sawdust.

The tricky part of this project was deciding where to place a few finishing nails so that they might hold the branches to the walls. This involved some guesswork, a lot of fumbling with a measuring tape, and — [sad trombone noise here] — math. I choose some likely locations and marked their x and y coordinates, measuring from the bottom left corner of the board.

Transferring those locations to the wall was annoying, too, but it worked! With a bit of tweaking, I had my very own branch painting.

Extra twigs went here: