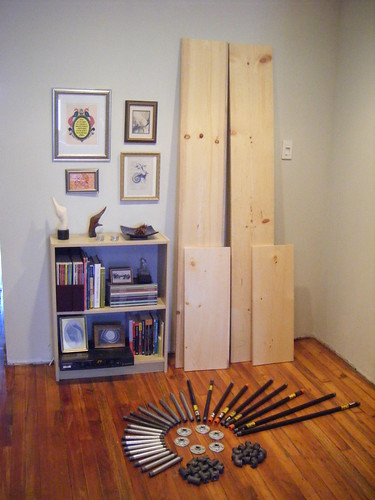
It has been a long time coming, but today I finally get to share with you some before…
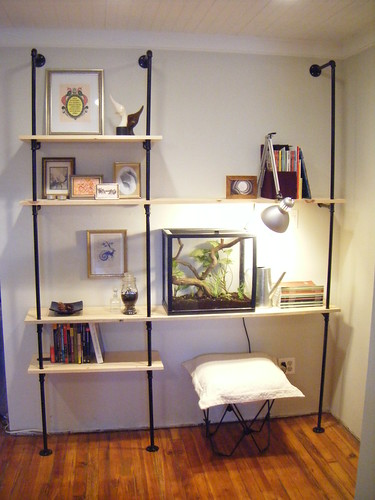
…and after pictures!
90% of the pipe shelving unit project was preparation. After the measuring, planning, re-planning, struggling to find supplies, etc. was behind me, the project came together in just a few short hours. I had expected to spend all weekend assembling the unit, and later to sum up the experience with a blog entry that began, “No part of this project was simple — do not attempt!” And yet I found myself staring in bewilderment at a finished product sometime around 3:00pm on Saturday. But let’s go back to the beginning.
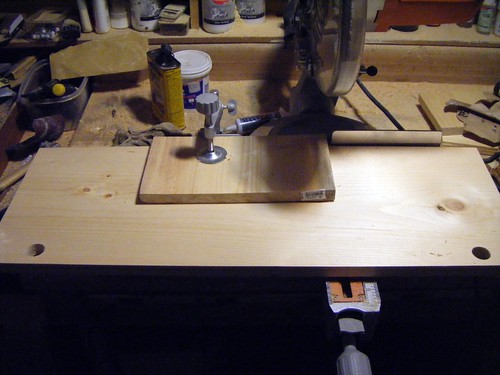
The first step was to trim my longer two boards down a bit (I was too generous when estimating the size of my wall), and then to drill several 1″ holes at specific points where the pipes would pass through.
This picture makes my basement “woodshop” look almost respectable. I assure you, it is not.
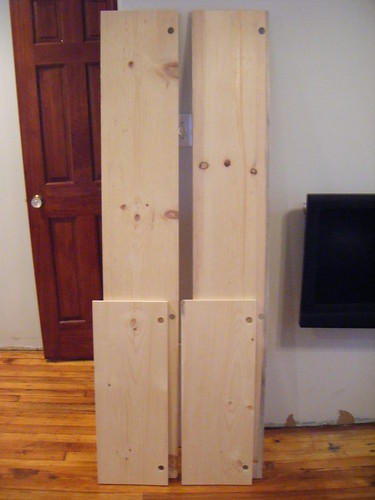
Once the cutting was finished and the boards were sanded a bit, I briefly considered patching up all their knot holes and staining them darker. But what I liked about this project was that it used only industrial materials — in keeping with the theme, I had purchased the cheapest utility-grade wood possible — so why not just embrace the imperfections? I decided to roll with the “scratch-and-dent section of Lowes-chic” look. This is probably what kept my assembly time down, and I don’t regret it at all. You’ve gotta cut yourself a break when you can.
From that point on everything was easy as pie, as demonstrated in this adorable gif:

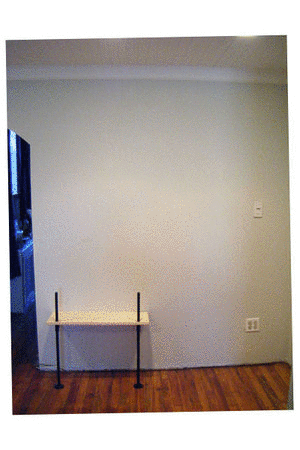
Here’s a shot showing how the shelves are supported:

Since the elbow fittings are designed to have just the same height as the tee fittings, the boards sit very evenly on these two points. And since the majority of the weight of the unit rests right on the floor, all I had to do was secure the top flanges to the wall with a couple of drywall anchors. The unit is remarkably stable. I’ll have to wait and see if the boards start to deflect over time, but if they do I can easily unscrew the whole thing and replace them.
And that’s it! A 3-month project finally wraps up. I’m sure I’ll be posting more pictures soon, particularly when that vivarium’s new resident arrives…
Notes:
1) I’m sorry all of my pictures look like they’re taken with a fish-eye lens. I’m working with a super cheap camera right now.
2) I’d post the final supply list, but I’m pretty sure it would only work for someone with a floor as sloped as mine. I believe the pipes on the left, starting from the bottom, are 18″, 12″, 24″, 10″, and 18″ segments. The segments on the right are something like 29″, 24″, and 31″, though 32″ was probably ideal. Shelf supports are 8″ each and the pieces that connect to the wall up top are 10″, though if you can find 9″ that might work better. BUT only if your wall is nice and flat!
3) Yes, I know, I still have no baseboards. It’s been — what? — a year? I should really tackle that next.
Baseboards are overrated. I have baseboards that we replaced when we moved in 14-some years ago that were primed, but never painted. And now I realize that puts me in a category with my grandfather, who renovated his house in 1958-ish, and I put the first coat of paint on them when we sold his house somewhere around 2003.Anyway, the shelving is pretty awesome. Well done.