When I was still in college, a friend’s mom bought one of the new cowhide rugs from IKEA, triggering a mini-obsession for me. It was an impulse buy for her and I think she never found anywhere to put it, but for the brief time it lay out in her living room I couldn’t keep my hands off the thing.

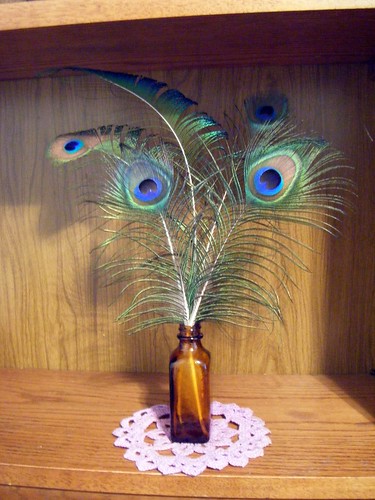
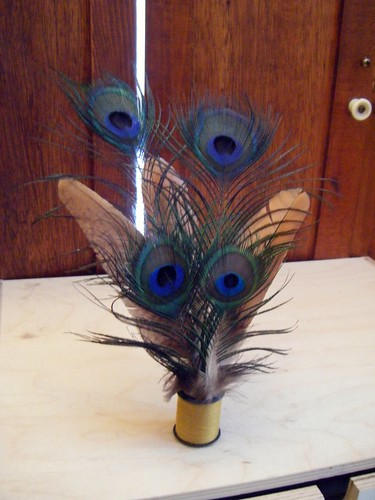
For some people I suppose that seems strange — a hide is evidence of the death of an animal, after all — but I’ve always been strange. I like cowhides for the same reason I like peacock feathers and funky plants and skulls and driftwood and praying mantids, and probably for the same reason I studied sculpture in college. The structures and complexities of natural objects are just fascinating to me.

Nature is the best artist of all, so they say.

Anyway, I put off owning a cowhide myself because a) they’re expensive and b) I wasn’t really sure of how to incorporate one into my home without the pattern becoming too dominant. But I’ve been seeing some great examples on design blogs:


Lots of hides, here!

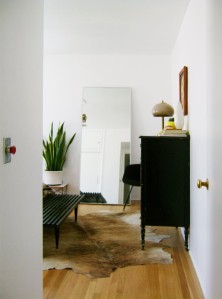
Love the brindle pattern and the angle of the placement. Via The Brick House.

Via Apartment Therapy.

Blog posts mentioning cowhides always seem to attract controversy, with the con people arguing that they just aren’t classy and the pro people arguing that they bring a nice sense of organic irregularity to balance all the right angles of modern furniture.

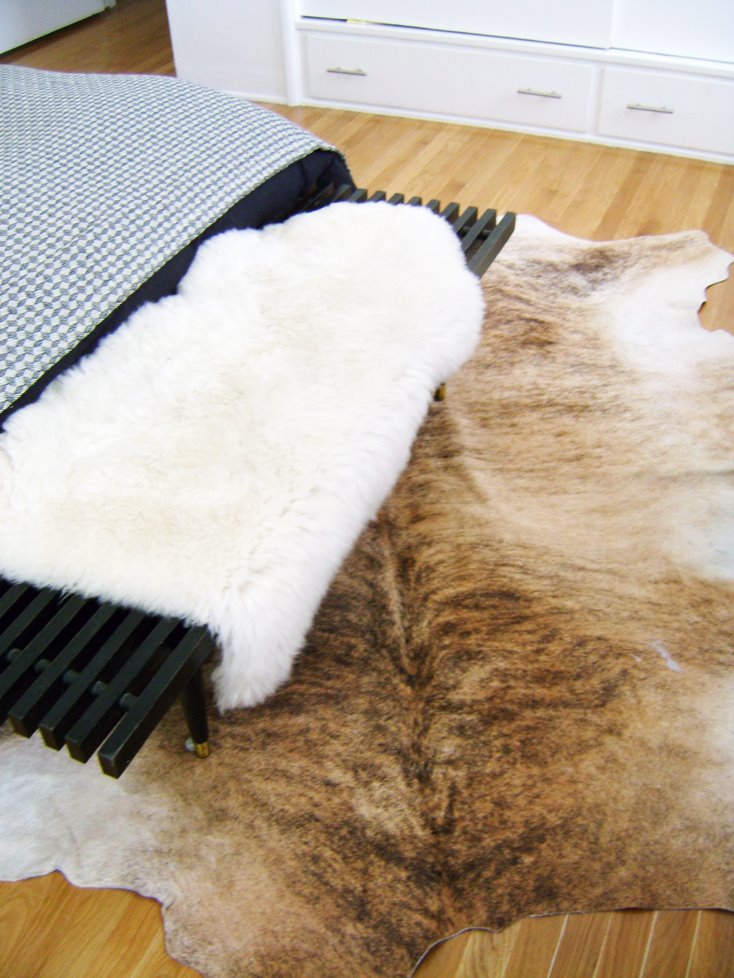
And although I’m aware that I may someday have house guests who are skeeved out by my choice of floor coverings, in the end the cowhide was also a practical option; hides are easily cleaned with soap and water, and, unlike square rugs, you have more freedom in arranging their placement to suit your space. So I picked one up second-hand on eBay. And for just $80!

The hide is super soft, with really nice patterning. I’m tickled pink.

In the last six months or so I’ve been putting together a little collection of artwork for my house. I blogged about a few of the prints before, but the collection has grown again and I just got around to hanging all of the pieces this weekend. On actual walls!

I’ll be working on a lot of house projects this month since I’m hosting my first-ever party on New Year’s Eve. And you’re coming, right? And you won’t care if I don’t own rugs, or serving platters, or holiday garland. Right?

Back to the art. I thought about putting a salon-style collection of prints with gold frames right above my couch. I even had them arranged on the floor in the exact pattern I wanted. But when I placed the first piece on the wall, it looked so good on its own that I scrapped my plans and left it alone.

In decorating as in art, editing is key. Print by Kate VanVliet. It’s an image made from soaked tea bags!

The rest of the prints were rearranged and moved to another wall:

Prints (clockwise) by Melanie Linder, Margaux McAllister, Amy Walsh, and Tory Franklin. Sculpture by me.

Margaux’s piece is actually on a notecard that someone named Laura gave me to me, telling me to have a great semester sometime in 2005. I’m embarrassed to admit that I don’t remember who Laura was. If she’s you, thank you very much for the card and I love the image.

The gold frames all came to me through thrift stores — I know they’re kinda kitschy, but I like the way they look in groupings.

And we can’t leave out Nicole Cook, whose woodcut is now in the bathroom due to a lack of gold frameage:


I know it’s really hard to see the details in this piece unless you’re right up close to it, but trust me, it brings the awesomeness. See for yourself by coming to my New Year’s party! RSVP on Facebook, or send me an email if we’re not Facebook pals.

My kitchen is small. Like, maybe 140 square feet small. Tiny. But I spend a lot of time in here, both because I’m starting to really enjoy cooking and because the kitchen is the best spot in the house for picking up my neighbor’s internet connection. For the last year and a half, I’ve had my counter set up like this:

With the dish drainer half-tucked under a cabinet. In theory, this meant that I could dry bowls and short cups under the cabinet, and plates in the slots in front of the cabinet. In practice, the plates prevented me from opening that particular cabinet door. Which prevented me from being able to put the dishes away. Ever.

I don’t know why the solution to this problem didn’t occur to me for, you know, eighteen months, but the morning after Thanksgiving I woke up knowing what I needed: open shelving! So my four-day weekend was absorbed by yet another home improvement project. I even ventured into IKEA on Black Friday. Terrifying.


It was worth it, though. With about $100 and three days, I slapped this solution together:

Now the dish drainer doesn’t block anything. In fact, it folds up when I’m finished so I can reclaim my pathetic four feet of counter space!

The only problem is that now everyone can see my dishes. My horrible, mismatched, half-from-Wal-Mart-and-half-trashpicked-already-chipped-from-an-old-neighbor’s-curb collection of dishes. This is serious broke-ass college student stuff, here. Needless to say, classic simple white dishware is now on my Christmas list.

Here’s a fun project that I started back in June and just managed to finish. The goal was to come up with some sort of mobile seating unit for my living room — something that I could use in front of the stove when I wanted a cozy seat by the fire, but would also be easily moved around the living room when I’m hosting guests. My thought was to create a low bench on coasters. But as with most of my grand ideas, I lacked a grand budget to get the job done. Enter…

Shipping pallets! Now, the good people at Apartment Therapy will tell you that any furniture project involving shipping pallets reeks of low class desperation. And to that I say, “low class desperation” sums up my design aesthetic perfectly. Not everyone gets to afford the gently worn $900 mid-century modern ottoman, mmk? It’s either sit on the pallet or park your keister on the floor at my house.

My shipping pallet was found at a warehouse near my office. I brought it home (it just barely fit in my trunk!) and started off the project by sawing it in half.

Each half got hit with a palm sander for a bit. Then I stacked the halves on top of each other, inserted some dowels at each corner and a few extra blocks of wood for support, and glued the two layers together. After that all the pallet needed was some flat black spray paint and a few locking wheels.

The only real expense to the project was the foam needed for seat cushions. I decided to order cushions in the same size as the ones on my couch, so I could share slipcovers between the two pieces. Two extra cushions plus shipping cost about $50. I had already ordered a new set of slipcovers for the couch (thanks to Bemz, my sofa is now aubergine!), and as soon as they came I switched out the old covers and slapped them on the new bench cushions to finish up the project.

The afghan was crocheted by my mom (who needs a blog, or maybe an Etsy store). And there you have it! Desperation chic.

Regular readers of the blog (are there any??) know that I was itching to pick up a miter saw a few weeks ago and get to work on something — anything — besides painting or staining. Well I finally did get my hands on one. And now that it’s firmly bolted to a work table in the basement (please, saw, don’t eat me!), I’m able to tackle overly-ambitious projects like this one:

Why build half of a bookcase where a whole one could fit?

I set out to remedy the situation. Not knowing, of course, that the answer was “a whole one doesn’t fit.” But we’ll get to that in a bit.

From what I could tell, the bookcase was made of three Masonite panels that formed the back and sides, with the shelves attached using screws driven from the outside of the Masonite inward. Then the whole unit was hoisted up and attached to the wall. A few added strips of molding later and it looked as though it had been built right alongside the house. I thought this was a clever construction technique since it hid all the hardware, and I set out to replicate it.

Several hours later, I ended up with a matching lower unit including two shelves attached to their sides and back panels… sitting in the middle of my living room floor. Because when assembled, it couldn’t swing past the stove and the radiator cover to get into the alcove where it belonged. Blast. This is why I only had half of a bookcase!

I quit in favor of having a few glasses of wine and a good night’s sleep. The following day, I came up with the following work-around, which is crazy and long and you can just skip to the pictures below if you’re not interested. Wait, here’s one now!

Anyway, I first removed the back panel of my new unit and swung that one piece into position so I could mount it to the wall. I then removed the top shelf from my now-backless construction, pressed the Masonite side panels together in the gap where the shelf had been, and squeezed them and the lower shelf into place. Bending the right-most panel down and to the left, I managed to get a screwdriver behind it and re-attached it to that side of the top shelf. I was stuck when it came to the other side, though. I raised it into place and drilled some screws directly into the wall underneath it, so the shelf rested on the screws. Then I carved channels into the underside of the shelf to hide the screw heads.

I might not choose to sit on the shelf, mind you, but it’s more than enough support for my books.

Ta-da!

And as an added bonus, I now have a place to house some of my artwork. Here’s an old sculpture of a bull that I made right after graduating college:

I’ve been thinking of posting the bull as the first piece for sale in my Etsy shop. I will get back to making art instead of bookcases, someday. In fact, I think this week might be the week.

My back yard has problems. I’d like to use it as an extension of the house in the summertime, but I seem to be the only person in this neck of the woods with that ambition. Most of my neighbors seem to think of their yards as a place to imprison the dog when caring for it becomes too annoying. And for storing old construction debris. As such, my yard is overrun with flies and mosquitoes.

Trapping them has become something of a hobby, but until I make some headway I decided that I needed a more immediate way to enjoy the back yard bug-free. Enter IKEA, of course. They sell this great mosquito netting draped around a 56″ hoop, which you can hang like curtains around the space you want to protect from the little winged vampires. 56″ was a bit too big for my little back yard, though; I didn’t have a place to hang the hoop where it wouldn’t bump into things. So I went about changing the hoop from a O shape to a D, so I could mount the flat face straight up against the side of my house.

This involved math (circumference = diameter x pi, yo), a hacksaw, and some DIY L-shaped sockets made out of an old curtain rod to hold the half-hoop to its newly straightened side. The project was a success, though, and an even bigger one when I returned to IKEA today and found an outdoor easy chair for $40 off!


Ahh. I’ve written this whole blog entry from the chair and haven’t swatted one fly. Excellent. Happy 4th, everyone!

Trash picking in Jack’s neighborhood is the best. A few weeks ago, I found a beat-up picture frame on the street and snagged it for this project: cheap whiteboard!

After gluing the corners back together, I picked up a piece of acrylic sheeting at the hardware store and cut it to fit. It took forever; none of these Home Depot/Lowes places cut glass, plexi, or anything like it anymore. So I did it myself with a big old blade and a million passes. Paint the back side with white paint, and:

The surface doesn’t seem to love all dry erase markers, but my cheapies from IKEA work just fine (no ghosting!). Total cost: $15.

A limb came off one of the street trees near my house during our most recent snow storm. After walking past it few times on my way to the grocery store, I decided to cut a couple of branches off and take them home. The thicker parts were grey, with reddish tips indicating more recent growth — a nice combination of colors to accent my warm-grey living room.

At first I figured I’d put them in a vase, but they were just too cumbersome to walk around. My next thought was to mount them to the wall. A quick glance at my super-low ceilings nixed that idea — not enough space. (But hey, my heating bill is low, too, so I can’t complain.) I had to find a way to tame the tree.

So I came up with this fun little project. Plan C: turn the branches into a 3-D “painting,” without the frame.

I rummaged through some old art supplies and picked a piece of illustration board to use as a size guide. Then I arranged a couple of branches on top, minding the composition the twigs were creating across the rectangle’s field.

With a trusted Sharpie, I marked the places where the branches hit the edges of the board. I then hacked across my Sharpie lines with a jeweler’s saw, mimicking the boundaries of the board.

Now I had a couple of branches cut into a perfect rectangle. And a carpet covered in sawdust.

The tricky part of this project was deciding where to place a few finishing nails so that they might hold the branches to the walls. This involved some guesswork, a lot of fumbling with a measuring tape, and — [sad trombone noise here] — math. I choose some likely locations and marked their x and y coordinates, measuring from the bottom left corner of the board.

Transferring those locations to the wall was annoying, too, but it worked! With a bit of tweaking, I had my very own branch painting.

Extra twigs went here:

No aminals were harmed during the decorating…

Once in a while, the blogger behind It’s Lovely! I’ll take it! finds a real estate listing in which every picture of the house contains the same ugly green plastic chairs. Green chairs for the dining room table. Green chairs in the basement, backyard, bedrooms(?!). And it almost seems as though the chairs are alive, following the photographer through the house. Ready for their 15 minutes of fame.

That’s my house. Except instead of plastic chairs, I have peacock feathers.

In the living room (in a thrift store vase):

In the dining room (in a candle holder):

On the mantle by the fireplace (in a shot glass?):

In the office (in a empty bottle of vanilla extract?!):

In my bedroom (in a spool of THREAD?!):

I NEED TO BE STOPPED. When I sell this place, “It’s Lovely” is going to have a field day snarking on me. In fact, I think I may have just written their post for them.

To my house:

Merry Christmas! This year, I bought you a coat. Of paint!

Next year, maybe I’ll actually unpack the boxes that have been cluttering your floor plan since August. No promises, though.

And one more gift! A new (used) set of shutters.

The shutters are cool not just because they hide the grill of the enormous air conditioner that used to command my attention during each meal. Their original home was actually the Annenberg estate in Merion. The owner of the Eagles bought the place and tore everything out, and these shutters ended up in a architectural salvage shop just a few blocks from me.

But hey, there’s nothing wrong with regifting!