I had been collecting a couple of quotes to have my floors refinished, planning to have the project done by early July. But I got a surprise last Thursday (on my birthday!) when the guy I picked for the job told me he wanted to start Friday morning at 8:30 am. So my 25th b-day was unexpectedly spent lugging my living room furniture into the basement. And then banishing myself from the house until yesterday.

It was a stressful weekend, for that reason any many others, but I can at least share some results!

………..Before………...….vs….……..After

More here!

A Tale of Five Floors

My big weekend adventure was to tear our the added layers of flooring in my dining room, in hopes of uncovering the original pine floorboards to match the living room. I’d like to have the floors in both rooms refinished together. (Eventually, I think I’ll tile the kitchen with real tiles, but that’s down the road quite a ways.)

Here’s a pictorial account of my archaeological adventure. It’s like National Geographic. But indoors.

Layer 1: Laminate Flooring
Ugly factor: Moderate ugliness. It’s obvious that we don’t have actual slate, here. As evidence, I present to you the following picture, in which you can see that two “tiles” with the exact same pattern were installed right next to each other. And in more than one instance, at that. Why…?
Ease of removal: Luckily, this stage was easy — all I had to do was remove the edge trim and the tiles popped right apart.

Layer 2: Plastic Liner
Ugly factor:
It’s trash bag-tastic! Trashtacular!
Ease of removal: Super easy. It rolled right up and found its way into a real trash bag.

Layer 3: Vinyl sheet
Ugly factor:
Vinyl — when linoleum just seems too upscale.
Ease of removal:
Moderate. I lucked out in that that this layer was not glued to the floor as I feared it would have been if it were real linoleum. So it rolled up easily, but those kitchen cabinets (pictured below) were actually resting on this layer of flooring. I had to remove them from the wall and go scooting them all over the room from this stage on.

Layer 4: Plywood
Ugly factor: Ummm… well, it is wood. Just not the kind I was looking for.
Ease of removal: None. Nada. Nothing was easy about this layer. For one thing, the plywood was anchored to the floor with a million screws. Screws that I couldn’t find, because their heads had been sealed over with a coat of plaster. Each time I discovered one, I had to clean the top of it with a wet paintbrush and a knife to get enough plaster out for the screwdriver bits to catch a grip.

Once in a while I’d miss a screw, try to yank the board out, and go flying across the room as I ripped the offending screw right through the plywood.

This part of the project took a full day’s work, and was only possible with the help of one of these babies:

Oh yeah. It’s tool time.

Layer 5: Original boards!
Ugly factor:
They’re dirty, but in good shape. Refinishing should be a breeze. Especially since I’m not doing it.


I’m blogging today from the great outdoors, if my backyard counts. I finally got patio furniture!

Just wanted to share a little DIY project before the week starts up and I get busy again. It involves finding a second life for the bunches of empty paint cans I’ve been accumulating since I started working on the house. I didn’t really want to chuck them out, so I saved the empties to use as flower planters. Here’s what they looked like back in March:

Inside each can, I inserted a plastic plant pot just small enough to fit inside the bucket, but big enough to leave a little rim sticking out to hold it in place. Figured it was better not to let the plants grow in latex paint water! I punched some holes in the bottoms of the cans for drainage, and filled the plastic pots with potting mix and some wildflower seeds.


The hooks were already there, so I hung a can on each. And here they are today:


I didn’t expect the cans to rust (aren’t they tin??), but I’m glad they did. The color is really nice against the back wall of the house. The plants haven’t quite got this “flowering” thing down, though. We’ll see what happens.

Living room this morning:

Living room this afternoon:


Under all of that smoke-scented carpet, the 89 year-old pine floor boards are still here. Some are painted, some stained, some covered up with a faux wood wallpaper (why?!), and there are several inexplicable drill holes to deal with. But all in all, I think they’re reclaimable. After a little patching, a lot of sanding, and many many coats of polyurethane, they might come through with a nice antique look.

I’m hiring a bunch of dudes to do that part, though.

Tomorrow, I may tackle the stairs and the hallway. Purple carpet, I spit at thee!

Back from an eight-day stay in Chicago, where I worked at — where else? — Art Chicago. I rarely have time to poke around the city when I’m at fairs like these, but what little I’ve seen of Chicago in the last two years I’ve really loved. The architecture is astounding, and I think Philly could learn a lot from their approach to having art in public spaces.

I took some video footage of Jaume Plensa’s Crown Fountain. It’s a piece that’s hard to describe unless you can see it in action. One catch: I took the video in a portrait format with my camera and Flickr doesn’t have the capability to rotate it. So here’s one end of the fountain (there are two of these video pillars facing each other), sitting on its side!

[flickr video=3507504832 secret=bdf2a381e7 w=400 h=300]

This piece, as well as the other pieces in Millenium Park, all have an element of interactivity that, when presented together in such a great public space, makes for an art exhibit like no other. But you know, whatever. I’m not jealous or anything. We’ve got Rocky.

The rest of the week is too much to recap. I met some lovely people, some famous people, and some real jerks. I got hit on, I got yelled at, I got thanked. My faith in art was dashed and then restored daily. I’m exhausted.

One thing keeping my spirits up right now is that I returned to my house after a week of rain to find that my little container garden has really taken off. Here’s a picture from before I left:

I returned to:

So I had a nice side salad with dinner tonight. Can’t wait for tomatoes!

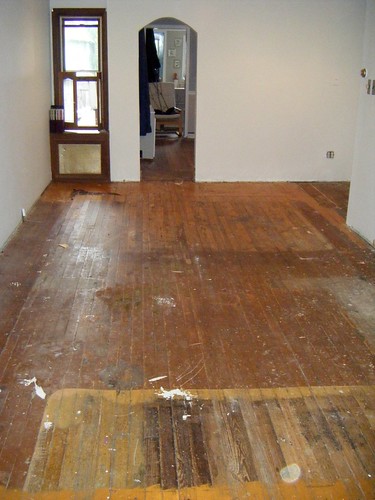
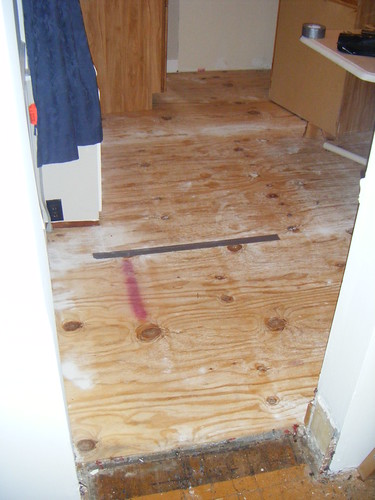
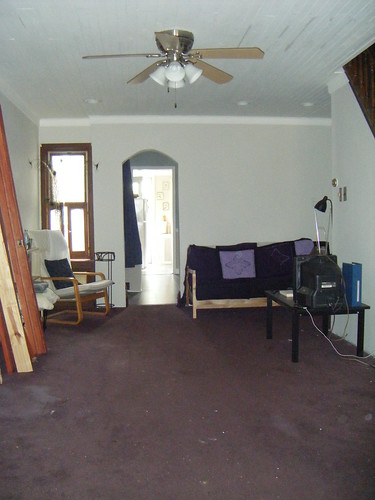
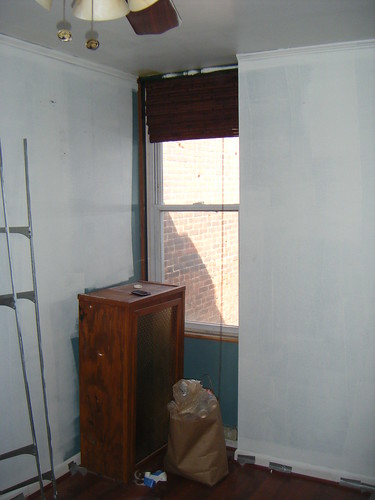
It’s the long-awaited craft room post! My sister used this room as a painting studio for a few months, and we gave it a coat of white primer for her. So this is what I was starting from:


Which is already better than the real “before” pictures.

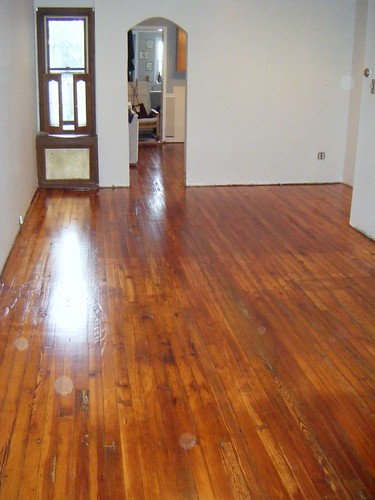
And now for “after!”:


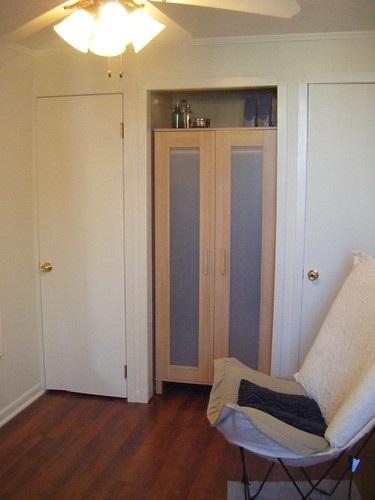
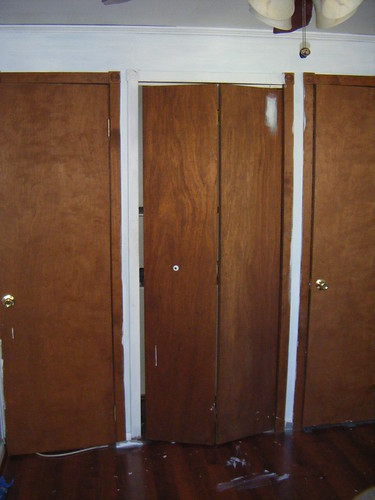
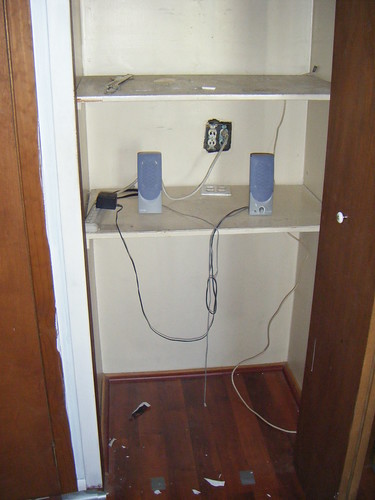
Lots of major changes. For starters, I removed the door to the middle closet and set my IKEA wardrobe in the space… which was technically 3/8 of an inch too tight. To get the wardrobe past the door jamb I had to take the entire thing apart and reassemble it in place, minus the back panel. But the missing back panel, as it turns out, was the only thing keeping the wardrobe from leaning to one side like a parallelogram from some geometry proof come to life. So I had to anchor the wardrobe’s side panels straight into the closet walls with some 4″ screws. Too much work, but I like the result! Seeing the space behind the furniture makes the room look a bit bigger.


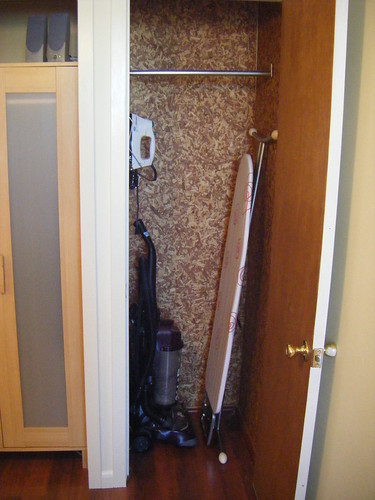
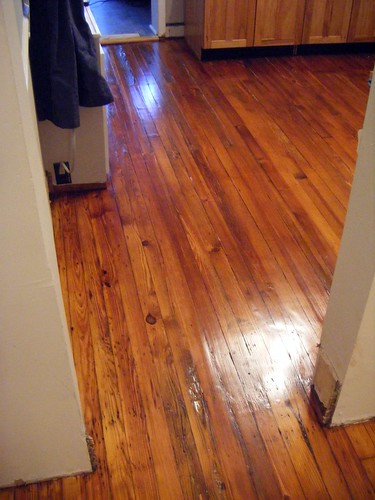
Both remaining closets are lined with cedar panels, which makes for a happy smelling room. The left closet holds linens and I fitted the right one with an iron hanger to go with my brand new full size iron. Weee! I don’t have to do laundry on the floor anymore!


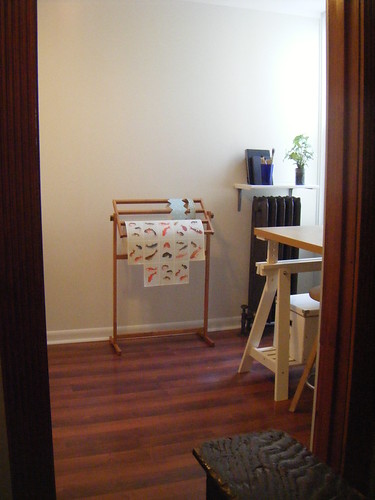
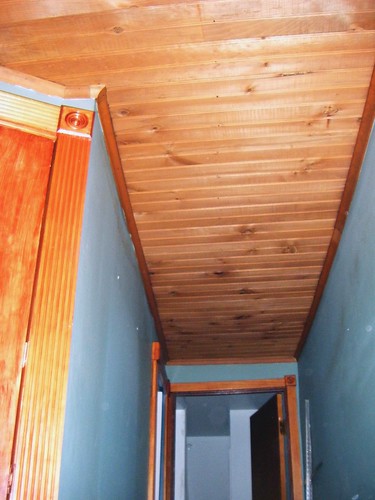
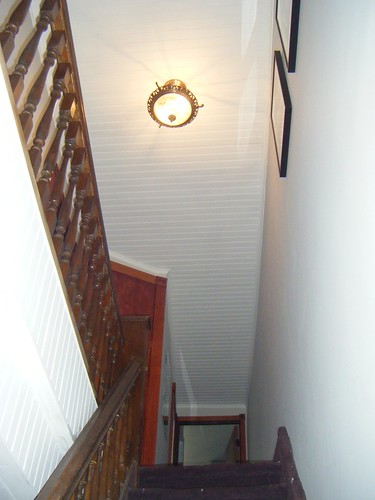
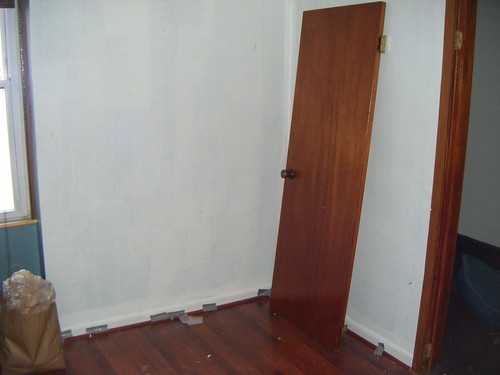
To open things up a bit more, I completely removed the door separating the craft room from the hallway. So it’s sort of like a second floor parlor. The room’s window helps light up the whole hallway now, which is a big improvement by itself!


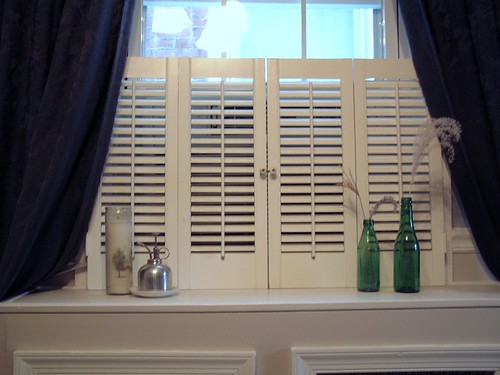
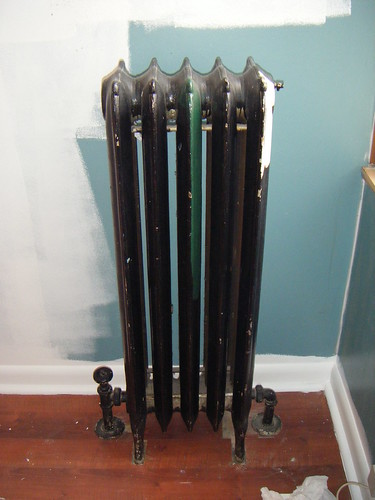
I decided that the old radiator cover took up too much precious window space, so I got rid of it. The radiator itself received a new coat of spray paint to pretty it up a bit. The hardest part was removing decades of dust accumulation from between the fins. The new “shelf” above it is secretly a defective cabinet door from IKEA’s as-is section: $2.99.


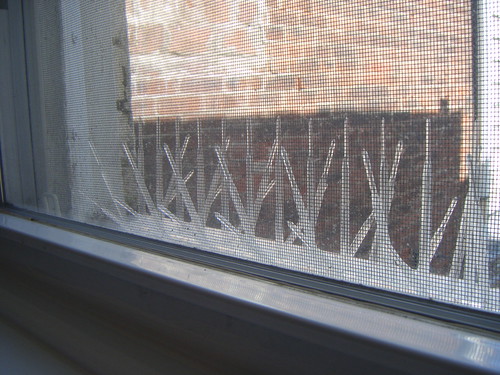
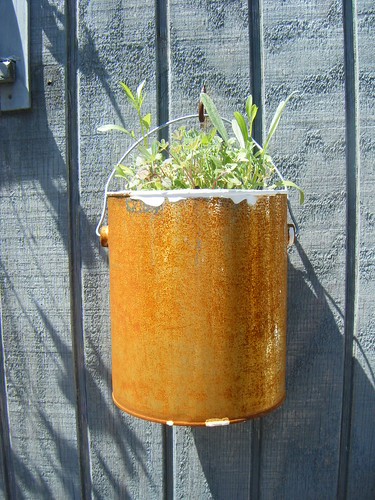
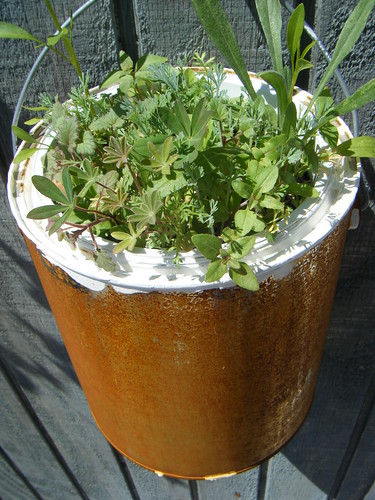
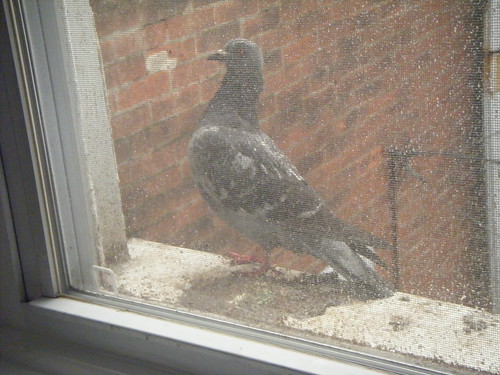
You know how they say dogs instinctively know not to crap where they sleep? Pigeons never got that memo. I like birds, but after months of watching this one particular rat-with-wings happily dozing in the sunlight on my windowsill while perched atop a mountain of its own feces — a mountain that I had to
remove with a chisel — I snapped. Anti-bird spikes it is. I briefly considered disguising them in a window planter, but I’m sure the offending bird would figure out how to sit on it somehow.


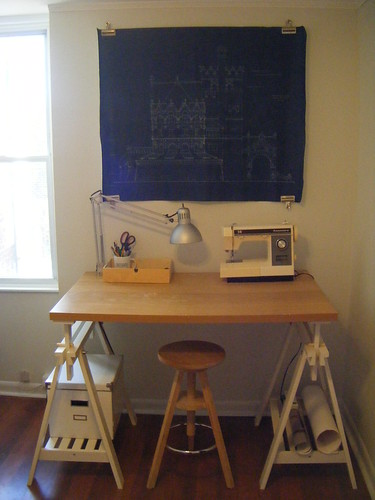
Over the work table I hung this old blueprint of the library at Penn’s campus. At my last job I worked out of this funky basement office space that used to house an architecture firm, and they left this drawing behind when they moved out. It’s beat up and I’m sure I’ll need to frame it someday before it falls apart, but I dig it in its temporary home.


This chair was the craft room’s first project. I’ve owned it for years, and at some point its seat had an unfortunate run-in with an exploded pen. Even after a good bleaching it was just too dirty-looking to sit on, but I couldn’t bring myself to chuck it. So after months of keeping the chair in hiding I finally took the seams apart and recreated the seat with some contrasting IKEA fabric. It
almost looks intentional, right?

So that’s it! That’s why no one has seen my face in weeks, and if they have it’s been speckled with flecks of off-white paint. I will now attempt to rejoin society.

Trash picking in Jack’s neighborhood is the best. A few weeks ago, I found a beat-up picture frame on the street and snagged it for this project: cheap whiteboard!

After gluing the corners back together, I picked up a piece of acrylic sheeting at the hardware store and cut it to fit. It took forever; none of these Home Depot/Lowes places cut glass, plexi, or anything like it anymore. So I did it myself with a big old blade and a million passes. Paint the back side with white paint, and:

The surface doesn’t seem to love all dry erase markers, but my cheapies from IKEA work just fine (no ghosting!). Total cost: $15.

Work on the house continues. In this month’s installment, the upstairs hallway!

Before:

After:

The carpet still needs to be yanked, but that’s a project for another day.

Finally, the last green-blue wall has been covered.

I also got to incorporate my first pieces of actual art into this home renovation project. These are drawings I made for a show at Lincoln Financial Field a year or two ago.

A limb came off one of the street trees near my house during our most recent snow storm. After walking past it few times on my way to the grocery store, I decided to cut a couple of branches off and take them home. The thicker parts were grey, with reddish tips indicating more recent growth — a nice combination of colors to accent my warm-grey living room.

At first I figured I’d put them in a vase, but they were just too cumbersome to walk around. My next thought was to mount them to the wall. A quick glance at my super-low ceilings nixed that idea — not enough space. (But hey, my heating bill is low, too, so I can’t complain.) I had to find a way to tame the tree.

So I came up with this fun little project. Plan C: turn the branches into a 3-D “painting,” without the frame.

I rummaged through some old art supplies and picked a piece of illustration board to use as a size guide. Then I arranged a couple of branches on top, minding the composition the twigs were creating across the rectangle’s field.

With a trusted Sharpie, I marked the places where the branches hit the edges of the board. I then hacked across my Sharpie lines with a jeweler’s saw, mimicking the boundaries of the board.

Now I had a couple of branches cut into a perfect rectangle. And a carpet covered in sawdust.

The tricky part of this project was deciding where to place a few finishing nails so that they might hold the branches to the walls. This involved some guesswork, a lot of fumbling with a measuring tape, and — [sad trombone noise here] — math. I choose some likely locations and marked their x and y coordinates, measuring from the bottom left corner of the board.

Transferring those locations to the wall was annoying, too, but it worked! With a bit of tweaking, I had my very own branch painting.

Extra twigs went here:

To my house:

Merry Christmas! This year, I bought you a coat. Of paint!

Next year, maybe I’ll actually unpack the boxes that have been cluttering your floor plan since August. No promises, though.

And one more gift! A new (used) set of shutters.

The shutters are cool not just because they hide the grill of the enormous air conditioner that used to command my attention during each meal. Their original home was actually the Annenberg estate in Merion. The owner of the Eagles bought the place and tore everything out, and these shutters ended up in a architectural salvage shop just a few blocks from me.

But hey, there’s nothing wrong with regifting!