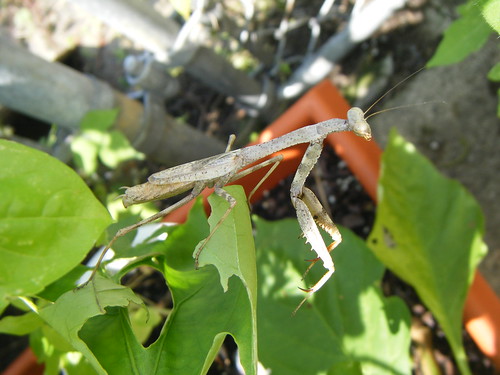
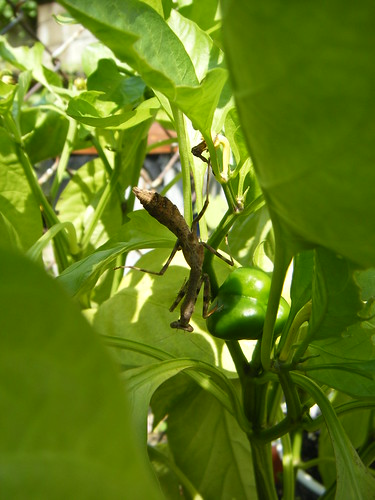
In my brief foray into gardening this weekend I managed to piss off not one, not two but five praying mantises. Each time a tried to snip a stray morning glory vine or yank a weed, one of the beefy-armed bugs would appear from nowhere and try to clamber up my arms. And then I’d squeal and drop the offending foliage, mantis and all. Sorry, creepy alien bugs!

(That’s my neighbor’s house. Excuse the general dilapidation.)

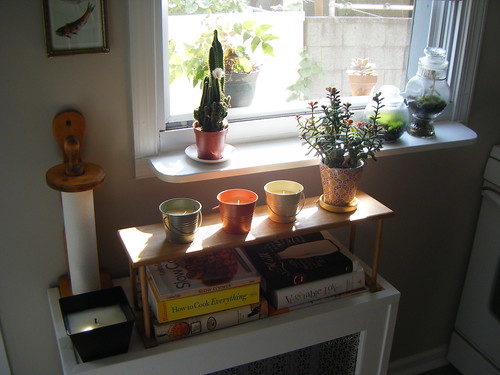
The mantii(?) may actually be making a dent in the fly and mosquito populations around here, because this afternoon has been downright pleasant outdoors. I managed to get more sugar snap peas planted, a few varieties of lettuce and also some butternut squash. So far, my container gardening experience this year had been mixed: I got lots of unblighted tomatoes (although on the smallish side), plenty of herbs, only a few peas, and no peppers so far because something is destorying the hell out of my pepper plants. Grrrrr. Get ’em, mantii!

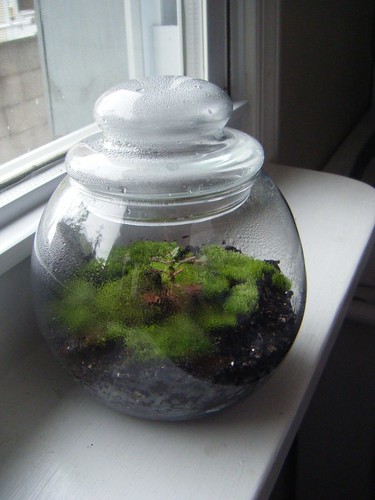
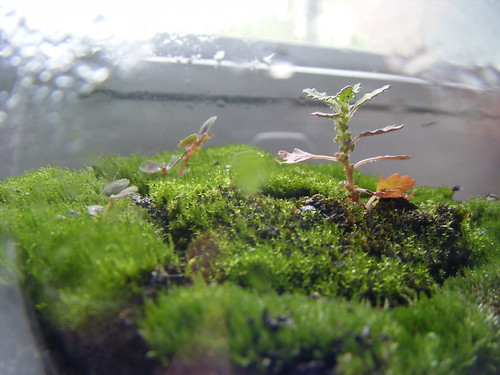
Also in the gardening/bug catching vein, I’ve planted this venus flycatcher in an old lidded jar I picked up at a thrift store, and it’s now one of my favorite things. Whenever I spot a fruit fly droning around the garbage, I catch it in a cup and dump it into the flytrap jar. It’s like a slow, very low-stakes gladiator contest.

That trap in the lower left is eating an enormous black fly! And somewhere in there right now is a nasty tiger mosquito!
(I’m not sadistic, I just hate bugs. Unless they eat other bugs, of course.)
Edit: I’m told that mantises is actually acceptable. Also, mantes and mantids.

Here’s a fun project that I started back in June and just managed to finish. The goal was to come up with some sort of mobile seating unit for my living room — something that I could use in front of the stove when I wanted a cozy seat by the fire, but would also be easily moved around the living room when I’m hosting guests. My thought was to create a low bench on coasters. But as with most of my grand ideas, I lacked a grand budget to get the job done. Enter…

Shipping pallets! Now, the good people at Apartment Therapy will tell you that any furniture project involving shipping pallets reeks of low class desperation. And to that I say, “low class desperation” sums up my design aesthetic perfectly. Not everyone gets to afford the gently worn $900 mid-century modern ottoman, mmk? It’s either sit on the pallet or park your keister on the floor at my house.

My shipping pallet was found at a warehouse near my office. I brought it home (it just barely fit in my trunk!) and started off the project by sawing it in half.

Each half got hit with a palm sander for a bit. Then I stacked the halves on top of each other, inserted some dowels at each corner and a few extra blocks of wood for support, and glued the two layers together. After that all the pallet needed was some flat black spray paint and a few locking wheels.

The only real expense to the project was the foam needed for seat cushions. I decided to order cushions in the same size as the ones on my couch, so I could share slipcovers between the two pieces. Two extra cushions plus shipping cost about $50. I had already ordered a new set of slipcovers for the couch (thanks to Bemz, my sofa is now aubergine!), and as soon as they came I switched out the old covers and slapped them on the new bench cushions to finish up the project.

The afghan was crocheted by my mom (who needs a blog, or maybe an Etsy store). And there you have it! Desperation chic.

I’ve been back to the studio this week. The very un-air-conditioned, very sweaty studio. But I’m dedicated! I’m going to get back on this horse! And I’m going to ride it until I find somewhere with air conditioning. No? Moving on.

Needing to start off slowly, I thought maybe I’d change directions and do a couple of wall pieces. I’m trying not to labor over these, as I think it’s important for me at this stage to focus just on trying some new things and getting immediate results.

I’m hoping to do a series of these pieces with a loose marine theme. This first one is fish-like, although as with all of my work its form shares elements with other organic structures.

After I cast the panel in plaster, I’ll draw back into the piece to give it some added depth and play up some of the textures.

Regular readers of the blog (are there any??) know that I was itching to pick up a miter saw a few weeks ago and get to work on something — anything — besides painting or staining. Well I finally did get my hands on one. And now that it’s firmly bolted to a work table in the basement (please, saw, don’t eat me!), I’m able to tackle overly-ambitious projects like this one:

Why build half of a bookcase where a whole one could fit?

I set out to remedy the situation. Not knowing, of course, that the answer was “a whole one doesn’t fit.” But we’ll get to that in a bit.

From what I could tell, the bookcase was made of three Masonite panels that formed the back and sides, with the shelves attached using screws driven from the outside of the Masonite inward. Then the whole unit was hoisted up and attached to the wall. A few added strips of molding later and it looked as though it had been built right alongside the house. I thought this was a clever construction technique since it hid all the hardware, and I set out to replicate it.

Several hours later, I ended up with a matching lower unit including two shelves attached to their sides and back panels… sitting in the middle of my living room floor. Because when assembled, it couldn’t swing past the stove and the radiator cover to get into the alcove where it belonged. Blast. This is why I only had half of a bookcase!

I quit in favor of having a few glasses of wine and a good night’s sleep. The following day, I came up with the following work-around, which is crazy and long and you can just skip to the pictures below if you’re not interested. Wait, here’s one now!

Anyway, I first removed the back panel of my new unit and swung that one piece into position so I could mount it to the wall. I then removed the top shelf from my now-backless construction, pressed the Masonite side panels together in the gap where the shelf had been, and squeezed them and the lower shelf into place. Bending the right-most panel down and to the left, I managed to get a screwdriver behind it and re-attached it to that side of the top shelf. I was stuck when it came to the other side, though. I raised it into place and drilled some screws directly into the wall underneath it, so the shelf rested on the screws. Then I carved channels into the underside of the shelf to hide the screw heads.

I might not choose to sit on the shelf, mind you, but it’s more than enough support for my books.

Ta-da!

And as an added bonus, I now have a place to house some of my artwork. Here’s an old sculpture of a bull that I made right after graduating college:

I’ve been thinking of posting the bull as the first piece for sale in my Etsy shop. I will get back to making art instead of bookcases, someday. In fact, I think this week might be the week.

Housiversary

Happy one year anniversary, house! On this day last year, after making it through closing, I found myself alone in your living room, sitting on some funky-smelling purple carpet, a wave of terror rushing over me. Just how much time, money and effort it would take to make you look anything less than hideous had very suddenly become clear. The task was daunting. No, it was paralyzing.

But that was a year ago. A “one day at a time, one project at a time” attitude has gotten us surprisingly far since then. And I think we should celebrate with… an enormous image post!

First, the kitchen:

That was then, this is now:

The dining room back then:

I see you, mom and dad!

And now:

And my proudest accomplishment so far, the living room:

And today:

Well, we don’t yet have baseboards or rugs, and window treatments are something of a dream. But now I have confidence that we’ll get there. Maybe next year, even.

(Just don’t ask me about the second floor 😉

Keeping busy

I want this floor tile. Now.

The house is currently providing a little distraction from a couple of sad events in my life. I’m also fairly sure that I’m not going to make much more progress on this living room of mine without buying a miter saw. Actually, I couldn’t fall asleep last night because I was too busy thinking about all the stuff I could do with a miter saw. Baseboards! Door trim! Planter boxes! I could extend the built-in bookcase in my living room and make it a floor-to-ceiling piece!

I like miter saws. Unlike their more mobile circular cousins, you always know where the blade is going to end up if something should go wrong. Should I go all fancy and get a sliding compound model?

Anyway, enough power tool dorkitude. The one-year anniversary of my closing date is on Saturday (so soon?!), so I’m working on some images to show my progress to date. I have about a hundred half-finished projects that are not photo-worthy, though. Maybe I’ll make it a yearly report.

My back yard has problems. I’d like to use it as an extension of the house in the summertime, but I seem to be the only person in this neck of the woods with that ambition. Most of my neighbors seem to think of their yards as a place to imprison the dog when caring for it becomes too annoying. And for storing old construction debris. As such, my yard is overrun with flies and mosquitoes.

Trapping them has become something of a hobby, but until I make some headway I decided that I needed a more immediate way to enjoy the back yard bug-free. Enter IKEA, of course. They sell this great mosquito netting draped around a 56″ hoop, which you can hang like curtains around the space you want to protect from the little winged vampires. 56″ was a bit too big for my little back yard, though; I didn’t have a place to hang the hoop where it wouldn’t bump into things. So I went about changing the hoop from a O shape to a D, so I could mount the flat face straight up against the side of my house.

This involved math (circumference = diameter x pi, yo), a hacksaw, and some DIY L-shaped sockets made out of an old curtain rod to hold the half-hoop to its newly straightened side. The project was a success, though, and an even bigger one when I returned to IKEA today and found an outdoor easy chair for $40 off!


Ahh. I’ve written this whole blog entry from the chair and haven’t swatted one fly. Excellent. Happy 4th, everyone!

Jack and I recently made a trip to Anthropologie to pick out a dress for my birthday. When I’m there, I like to scour their homewares section for ideas — not for stuff I can buy, necessarily, but for stuff I can recreate myself on the cheap. Anthropologie and Urban Outfitters really never disappoint in this department. I’ve already blogged about a jewelry stand project I borrowed from UO, and I found some great instructions a while back for making a DIY Anthro endtable out of a set of IKEA small storage drawers and some Home Depot molding. Beats spending $698!

As I’ve been on a gardening kick lately, the new terrariums at Anthropologie caught my eye. I’ve been noticing terrariums on design blogs for a while and they just seem so enticing. Like if you look closely enough at the miniature world behind the glass, you might be rewarded with a tiny unicorn sighting. Or something. Err… anyway, I was ready to grab a bell jar and plant away. Here’s Anthro’s version:

At 12″ high, it’ll cost you a cool $168. Jack and I spotted a much smaller version in the store for $38 — still unjustifiable, if you ask me. So I took a cue from an equally overpriced book they were selling on the “Thrift Store Chic” design aesthetic, and took my business to my local Red White and Blue. It didn’t take long to find a little glass bowl with matching lid for 99 cents. I took it home, scooped some gravel out of my aquarium, borrowed some dirt from the veggie garden, and I was ready to plant. It’s been so wet out lately that I had no trouble finding enough moss to carpet my tiny ecosystem.

After that I added a few… well, let’s be honest, they’re weeds. Two kinds: one that looks like a mini tomato plant with green and pink leaves, and one that looks like a teeny vine with some purple polka dots.

I put the terrarium in the kitchen by the window where the little globe fogged right up. The whole project was less than a dollar. And I like it enough that I think I’ll make a matching one for my bedroom. I just spotted a similar bowl with a stem and foot like a wine glass at a different thrift store…

I had been collecting a couple of quotes to have my floors refinished, planning to have the project done by early July. But I got a surprise last Thursday (on my birthday!) when the guy I picked for the job told me he wanted to start Friday morning at 8:30 am. So my 25th b-day was unexpectedly spent lugging my living room furniture into the basement. And then banishing myself from the house until yesterday.

It was a stressful weekend, for that reason any many others, but I can at least share some results!

………..Before………...….vs….……..After

More here!